How to Connect Google Analytics 4 to Your WordPress Website
GTM, Plugins, and other Techniques
Hello, friends! Today, we’re diving into the world of connecting your WordPress website to Google Analytics 4 (GA4). This comprehensive guide will cover multiple methods, including using plugins, manual insertion, Google’s Site Kit plugin, Google Tag Manager (GTM). Let’s get started!
Setting the Stage: Preparing Your Accounts
First things first, let’s make sure we have all the necessary pieces in place. You’ll need a Google Analytics account and a Google Tag Manager account. If you don’t have them already, don’t worry – it’s a breeze to set them up. Once you’ve got those accounts ready, it’s time to create a brand new WordPress website. In our example, we’ll be using a site called “https://www.astepping.com.” This is a fresh, clean slate, perfect for our little experiment.
1. A Google Analytics Account
2. A Google Tag Manager Account
3. A WordPress Website
Setting Up Google Analytics and Google Tag Manager Accounts
Create a Google Analytics Account
- Go to Google Analytics: Navigate to Google Analytics.
- Create a Property: In the admin section, create an account and property if you don’t have one.
- Set up a Data Stream: Follow the prompts to set up a data stream. This provides a unique Measurement ID you’ll use later.
Create a Google Tag Manager Account
- Go to Google Tag Manager: Navigate to Google Tag Manager.
- Create an Account: Set up your account and container for your website.
Now that we have our accounts ready, let’s move on to connecting them.
Using the Header and Footer Plugin
Let’s talk about a much more efficient way to connect your WordPress site to Google Analytics: using a plugin. Now, I know what you’re thinking, “But Rudranil, plugins are for lazy people who can’t code!” Well, my friend, let me tell you, sometimes being lazy is the smartest move you can make.
In this case, the plugin route is the way to go. It’s like having a personal assistant who handles all the tedious tasks for you, leaving you free to focus on the important stuff, like coming up with witty blog post titles.
The plugin we’ll be using is called “WP Code Insert Headers and Footers.” It’s like a digital butler, ready to serve up your Google Analytics code with a side of elegance and efficiency.
Step 1: Alright, let’s get our hands dirty and walk through the process of connecting your WordPress site to Google Analytics using this nifty plugin. First, head on over to your WordPress dashboard and navigate to the “Plugins” section. Search for the “WP Code Insert Headers and Footers” plugin and install it.
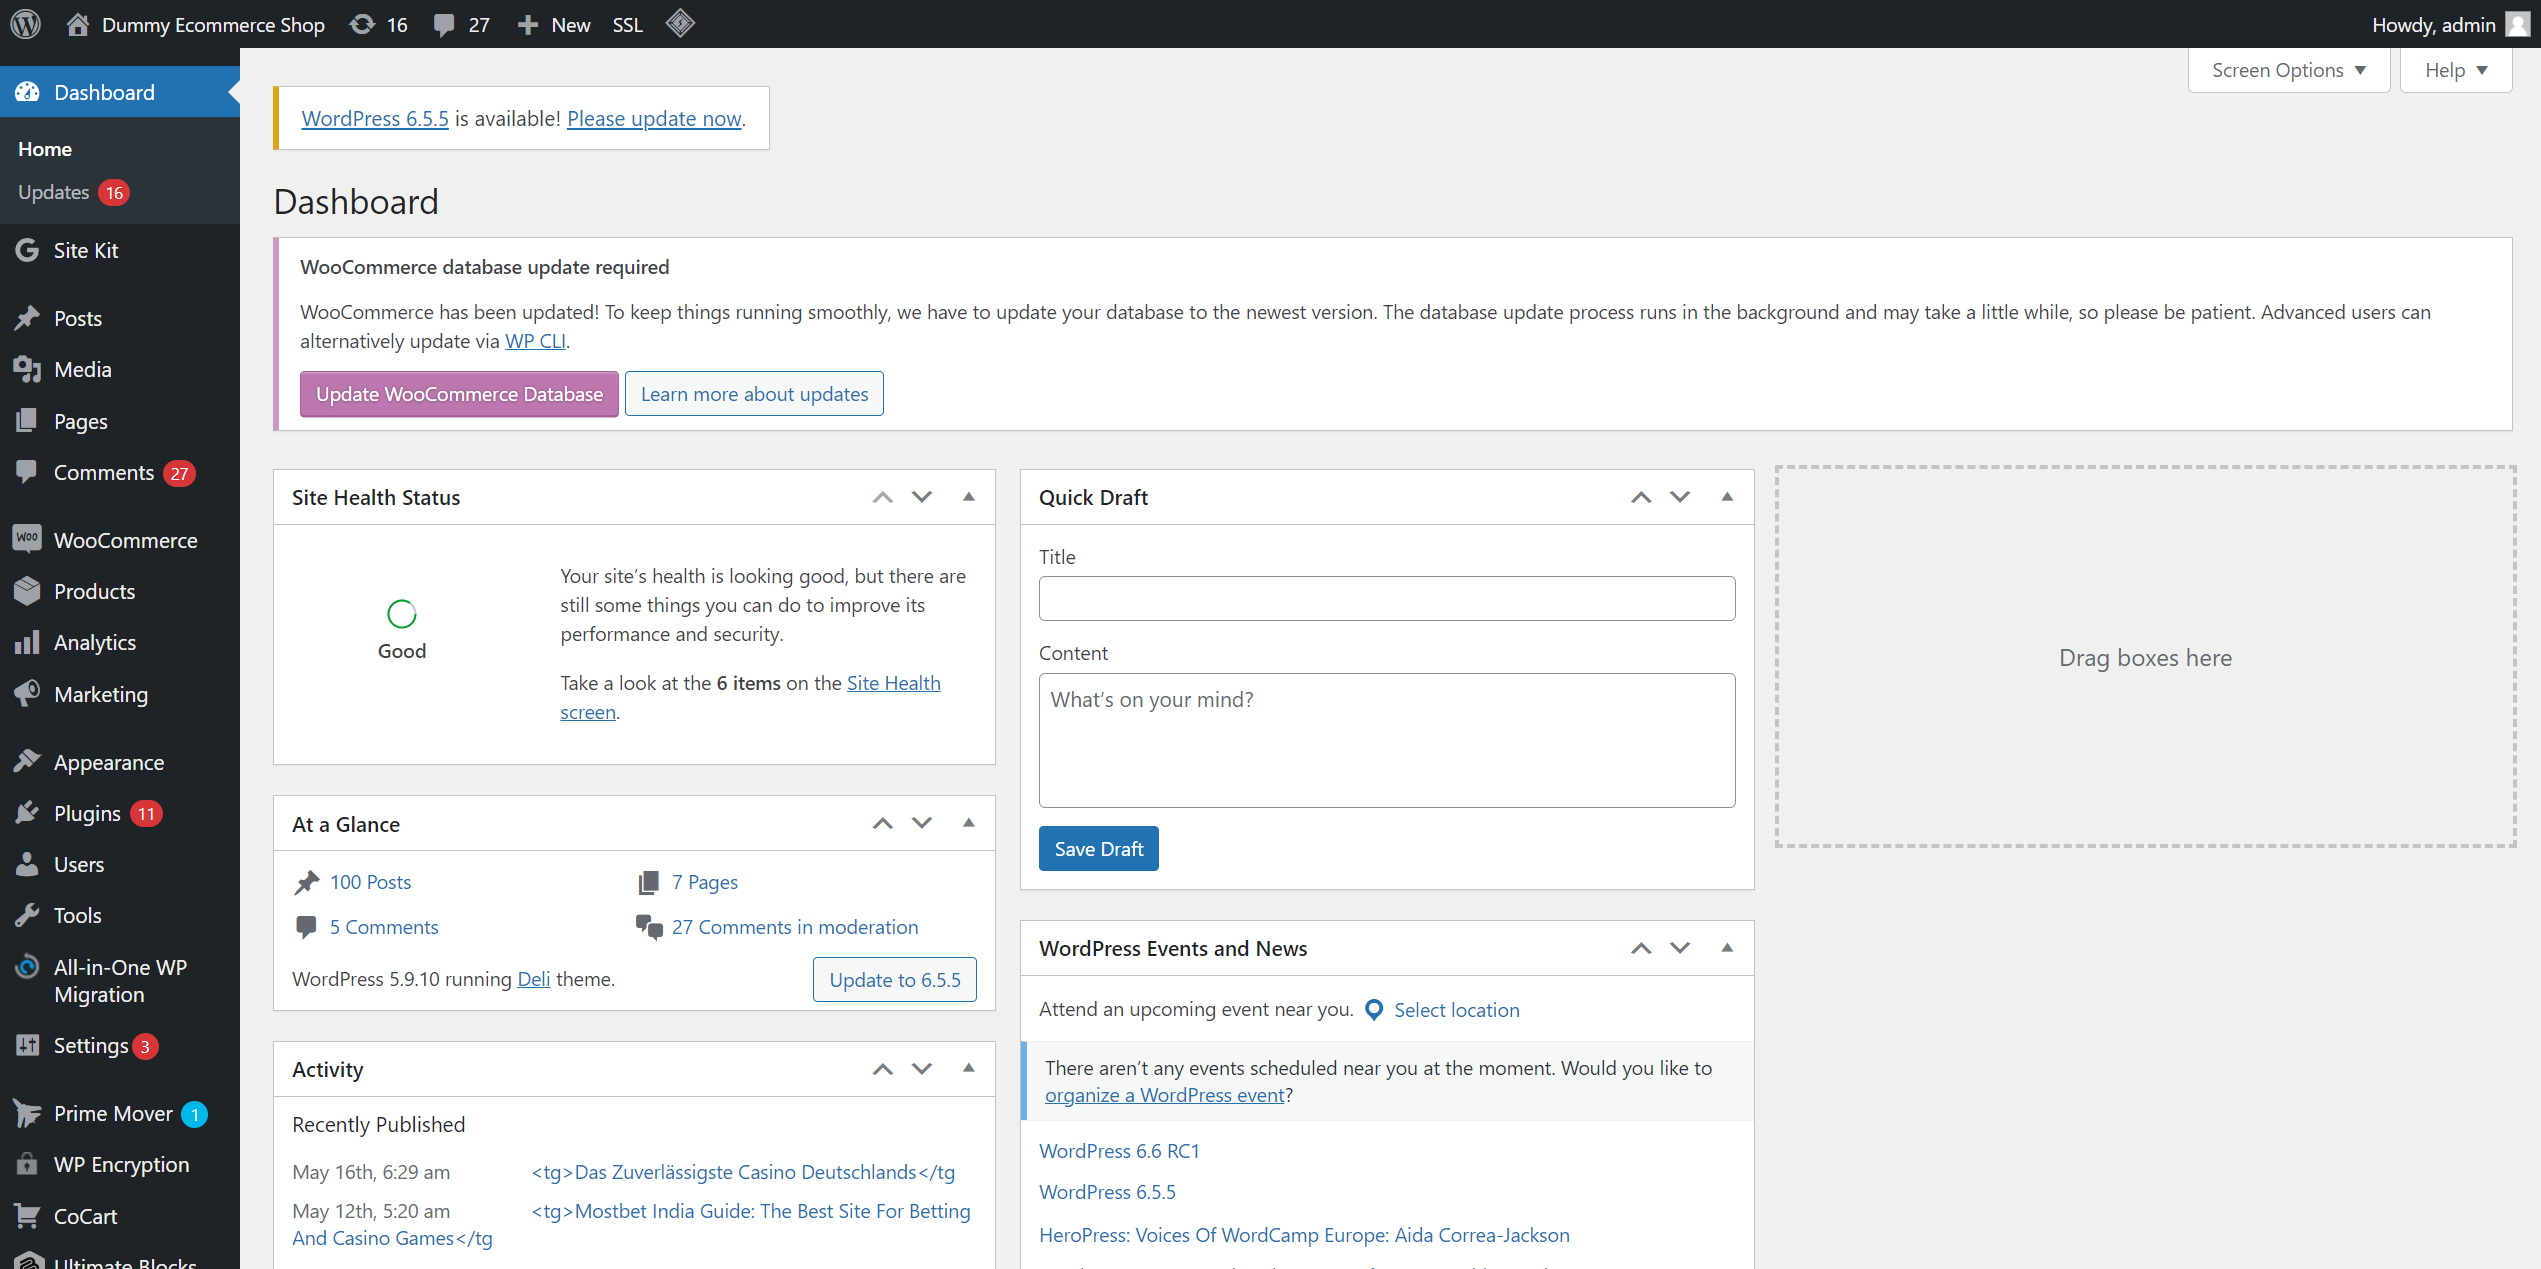

Click the add new link
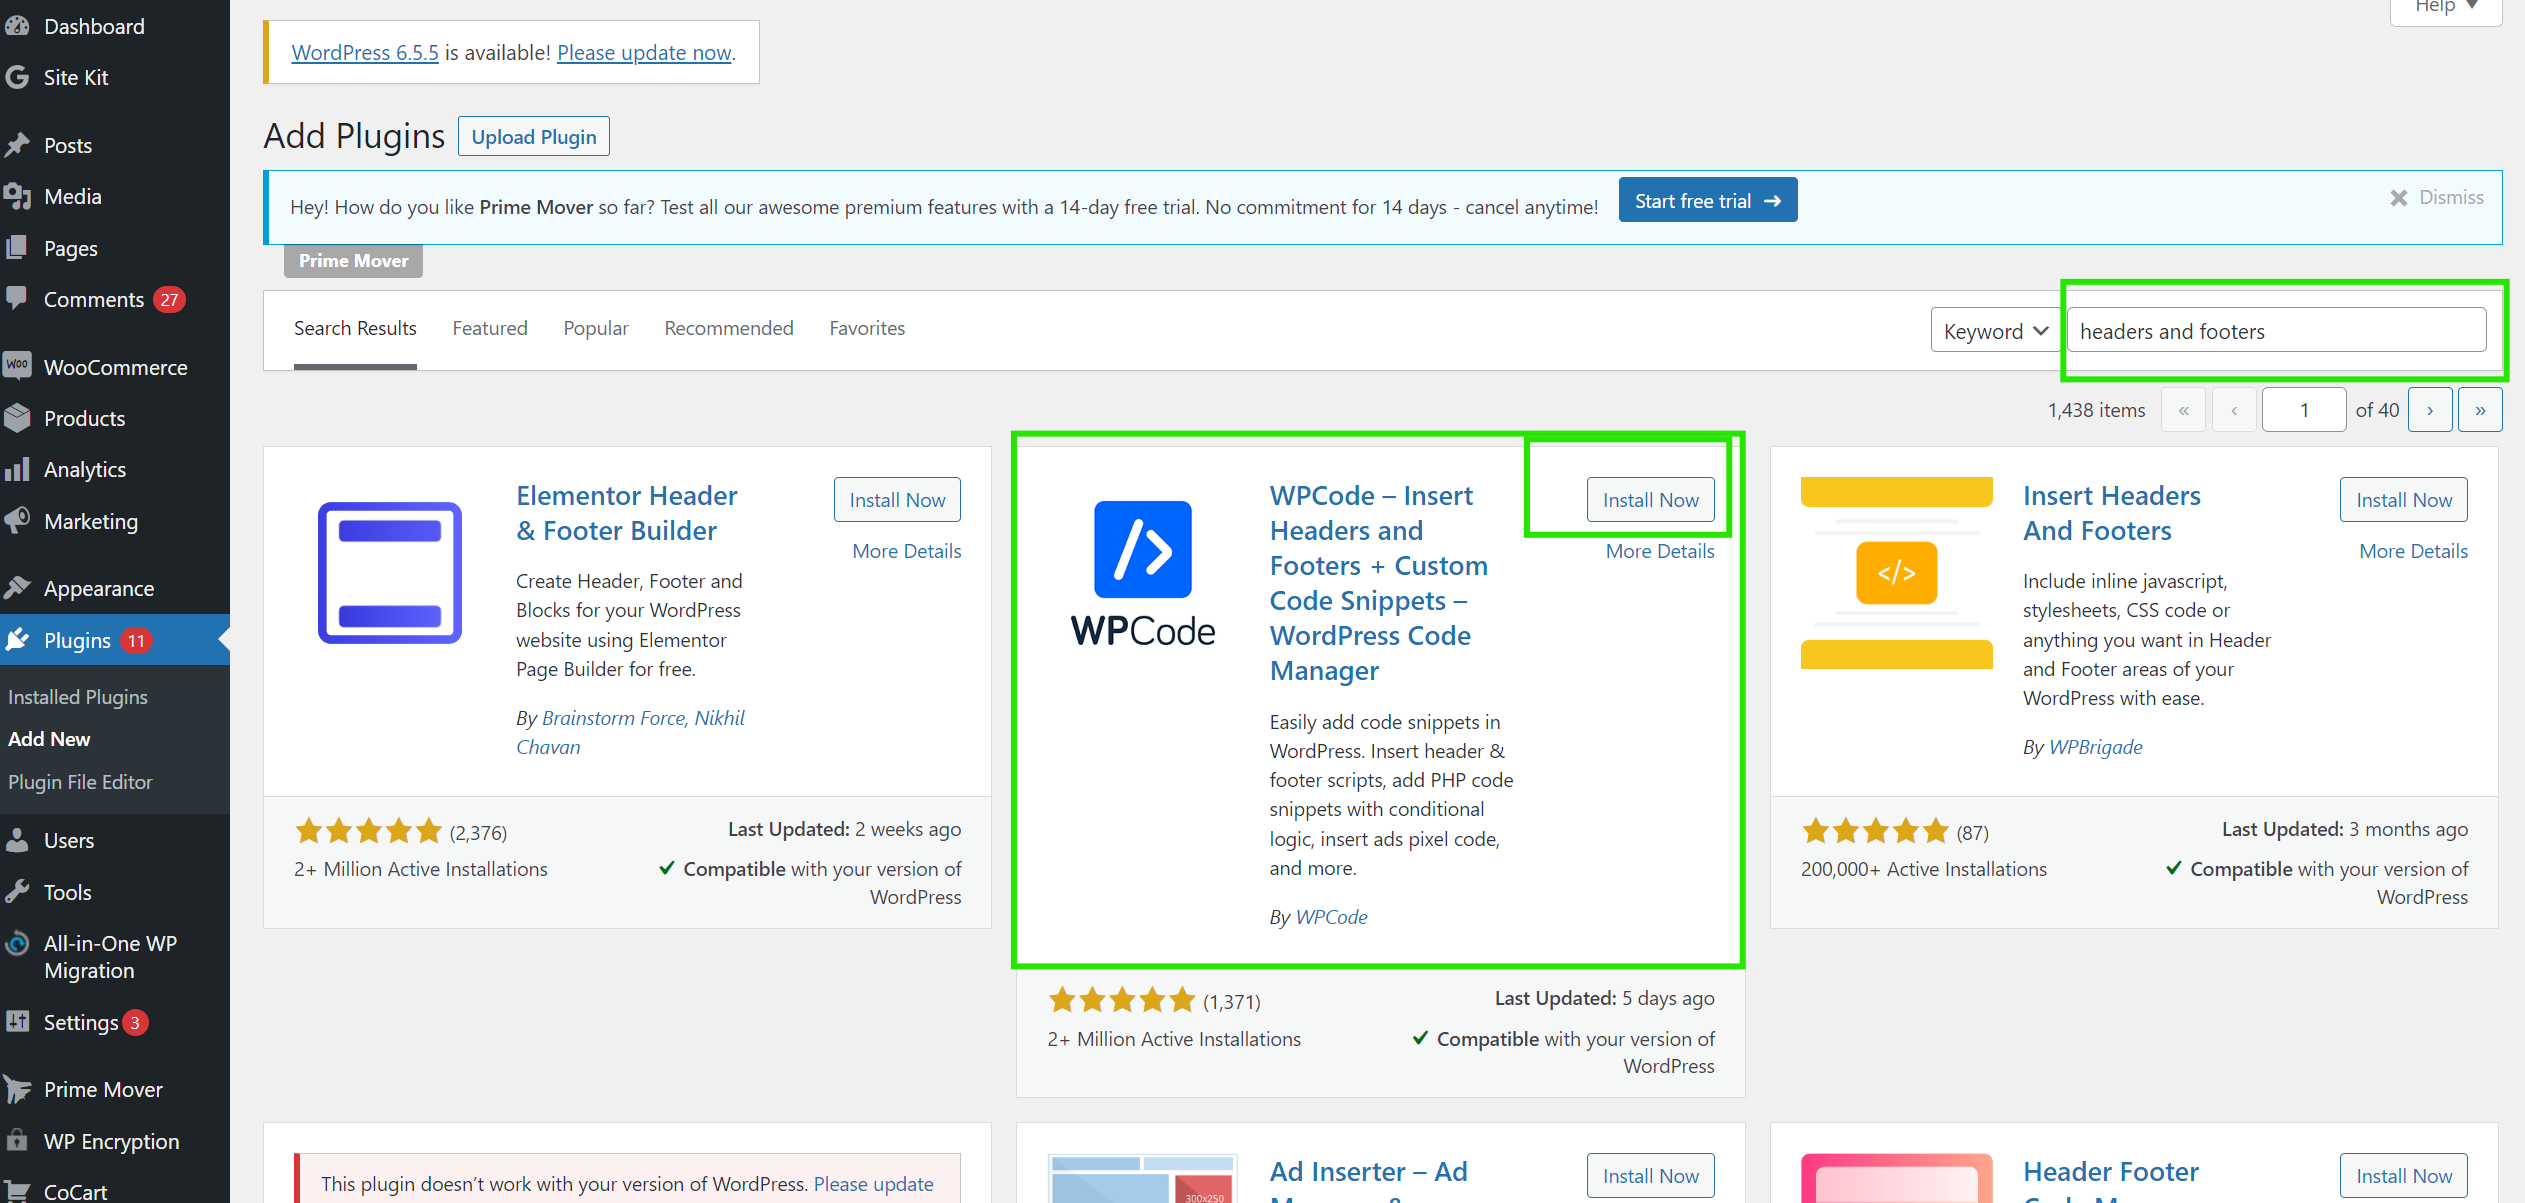
Click the add new link
Click the add new link
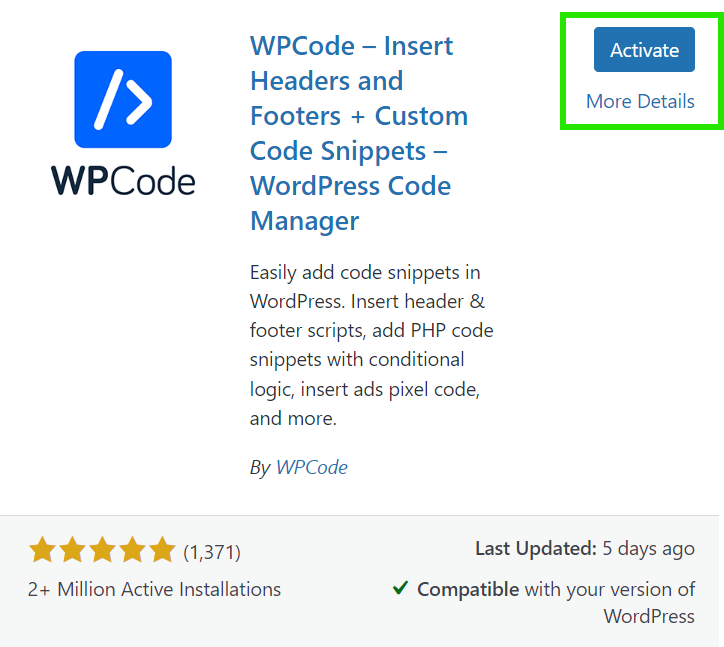
Click activate to start using the plugin.
Once it’s activated, you’ll find a new option in your dashboard called “Code Snippets.” This is where the magic happens.
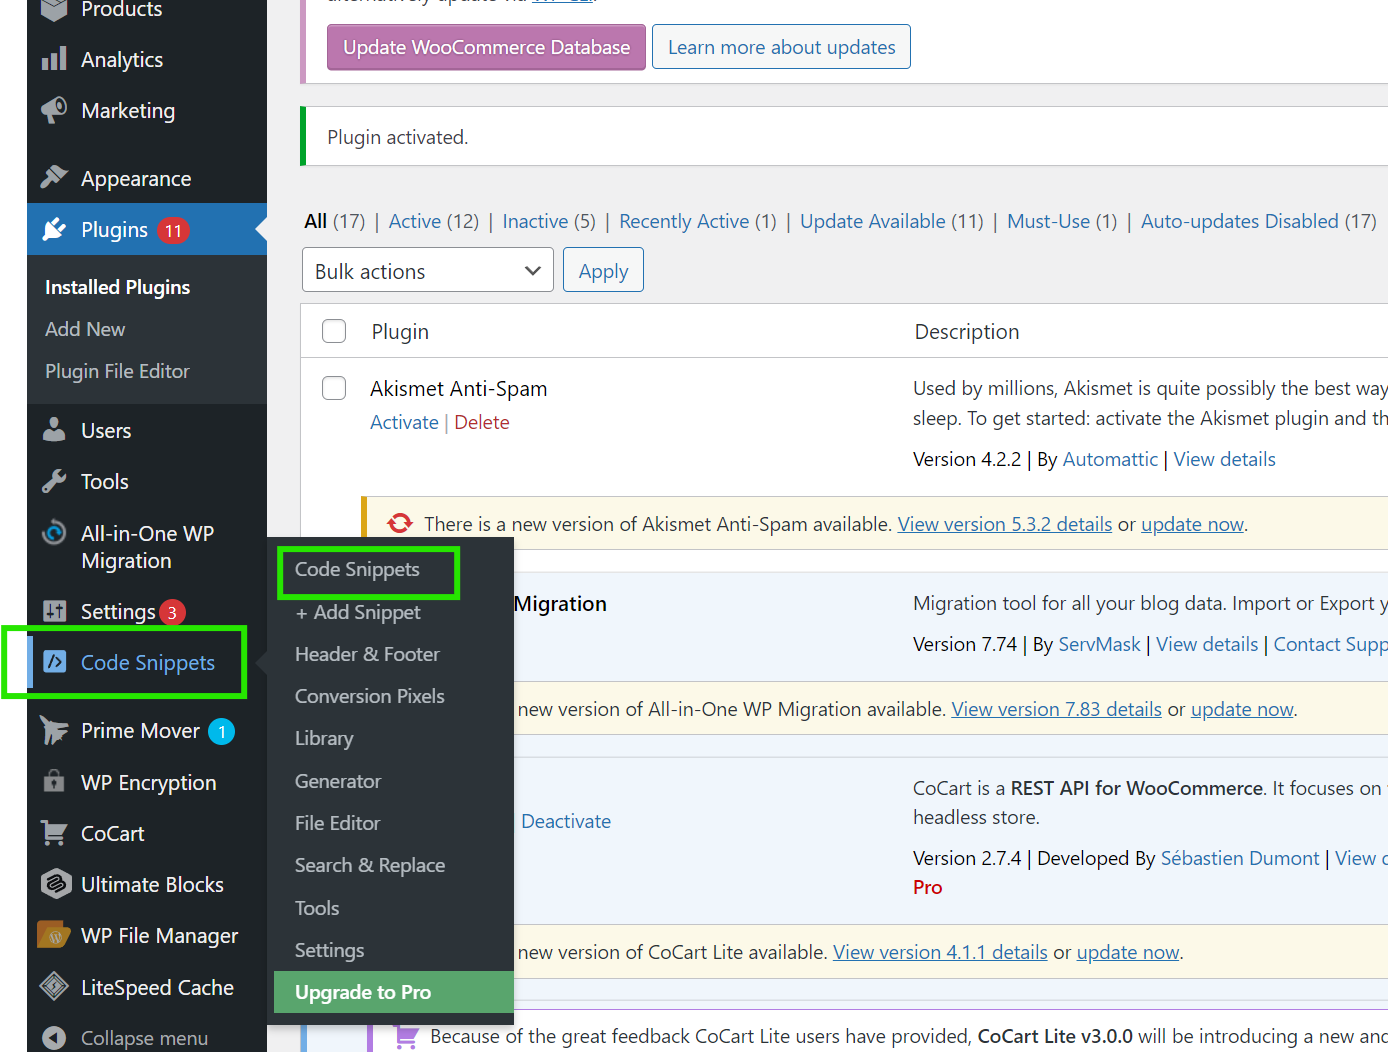
Click on the code snippets plugin
Click on the code snippets option
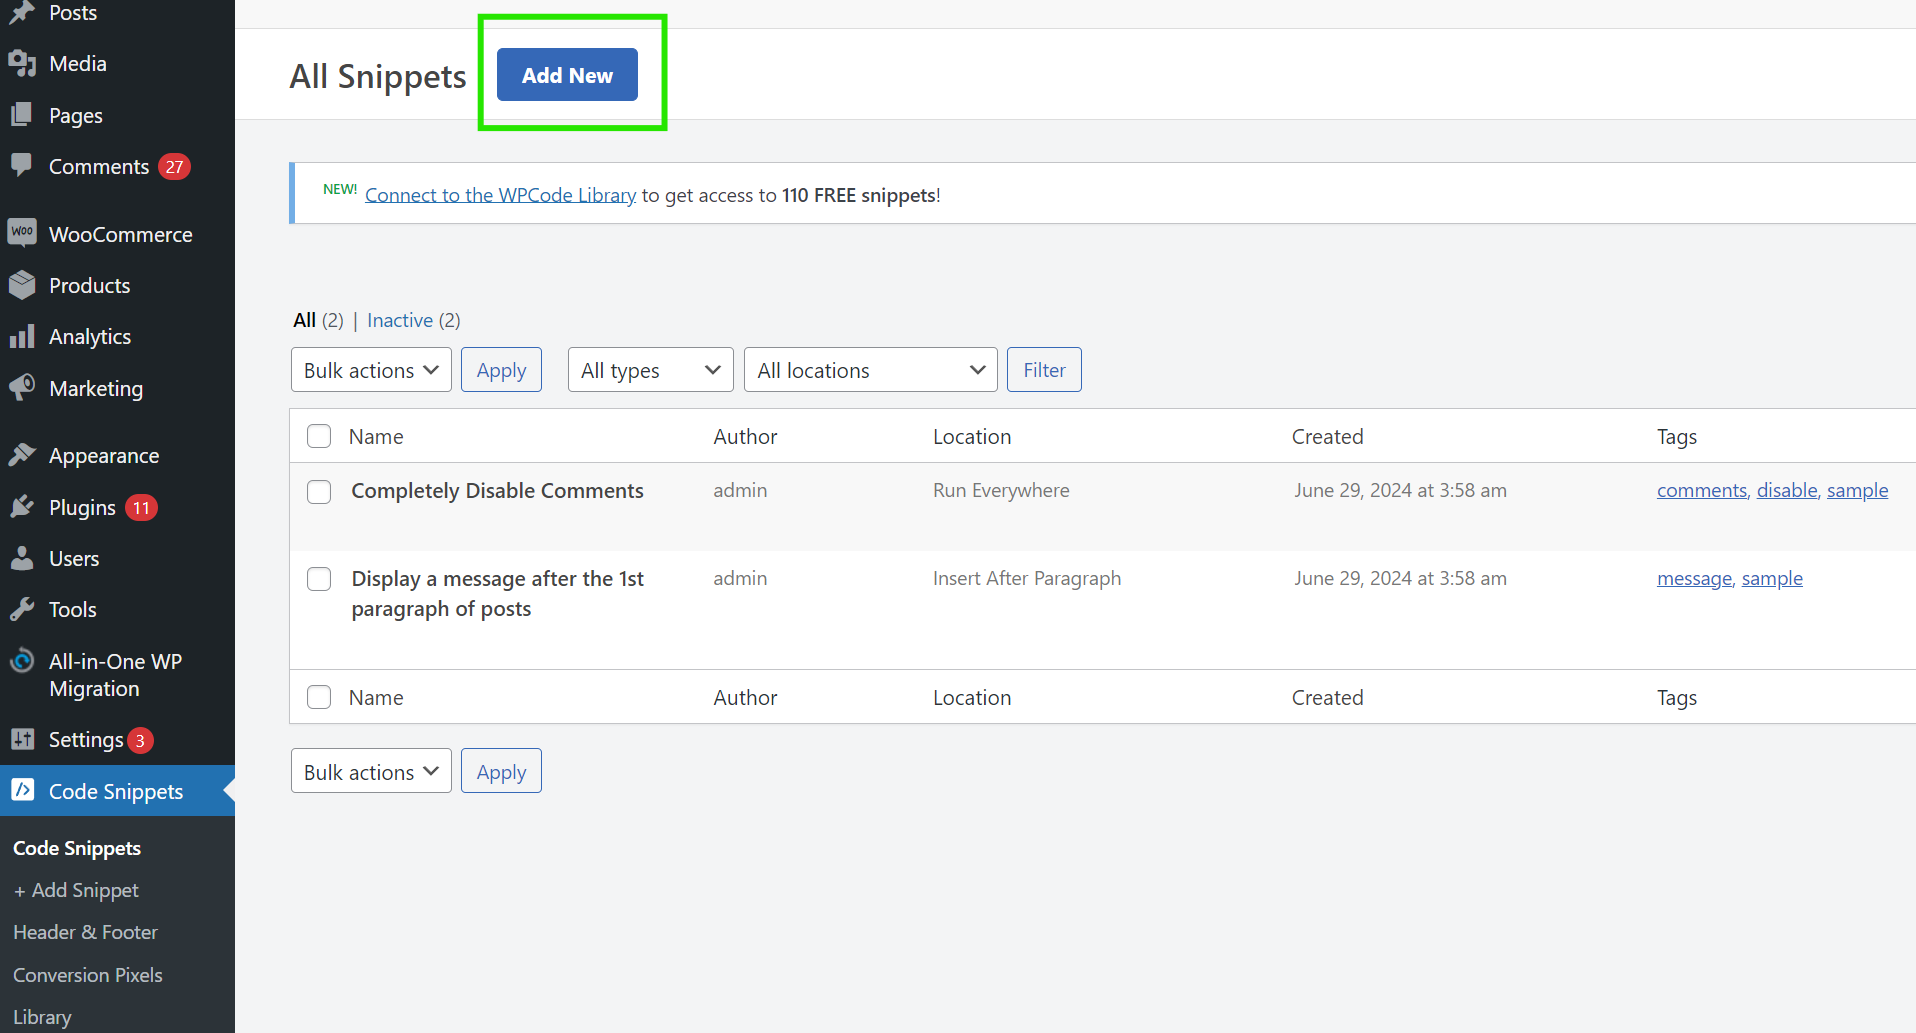
Click on “Add New”. This step will take us to creating a new code snippet, like that of Google Analytics tracking code, and ready for use inside this WordPress website.
Click on custom code to add the GA4 tracking code
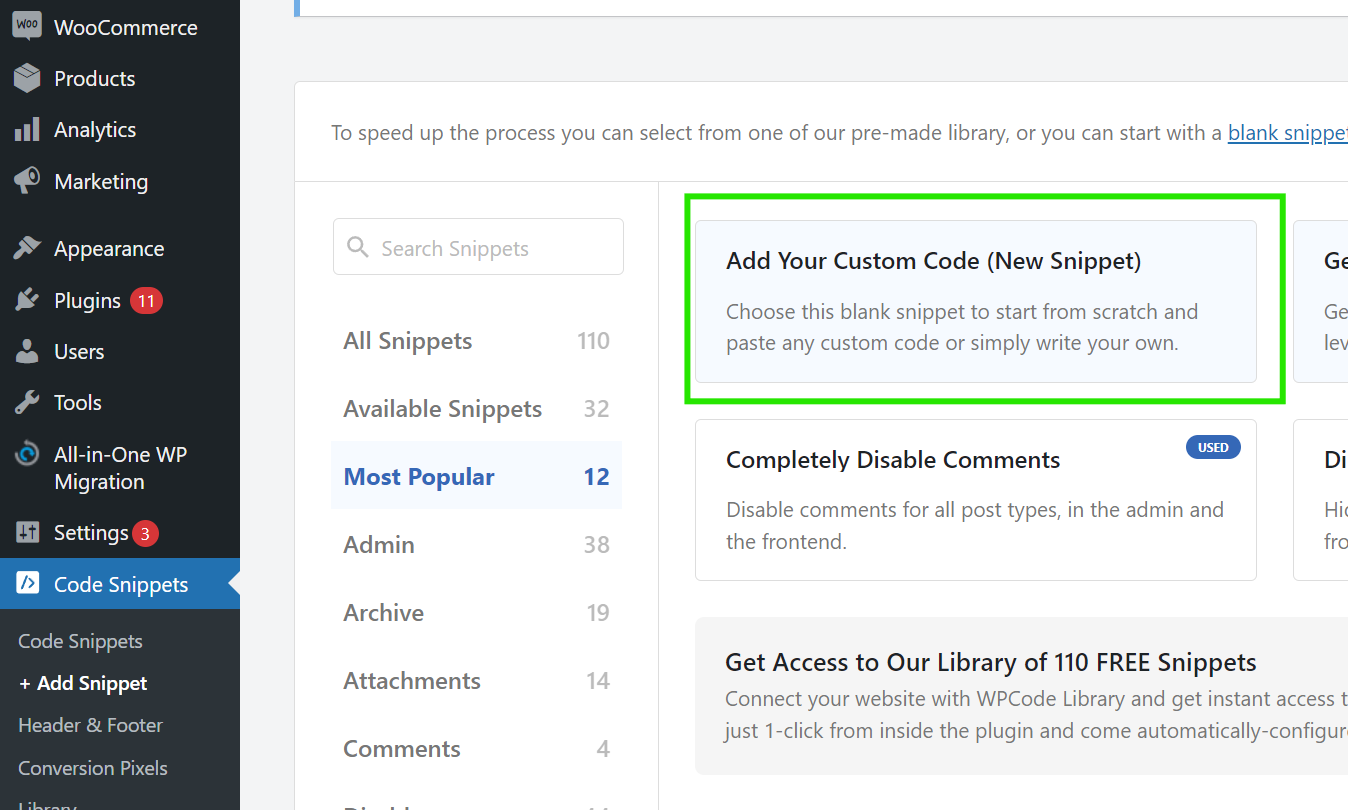
Click on custom code to add the GA4 tracking code
Now, you’ll need to grab the Google Analytics tracking code from your Google Analytics account. You can find this by going to the “Admin” section, then the “Data Streams” tab, and finally, clicking on the “View Tag Instructions” button.
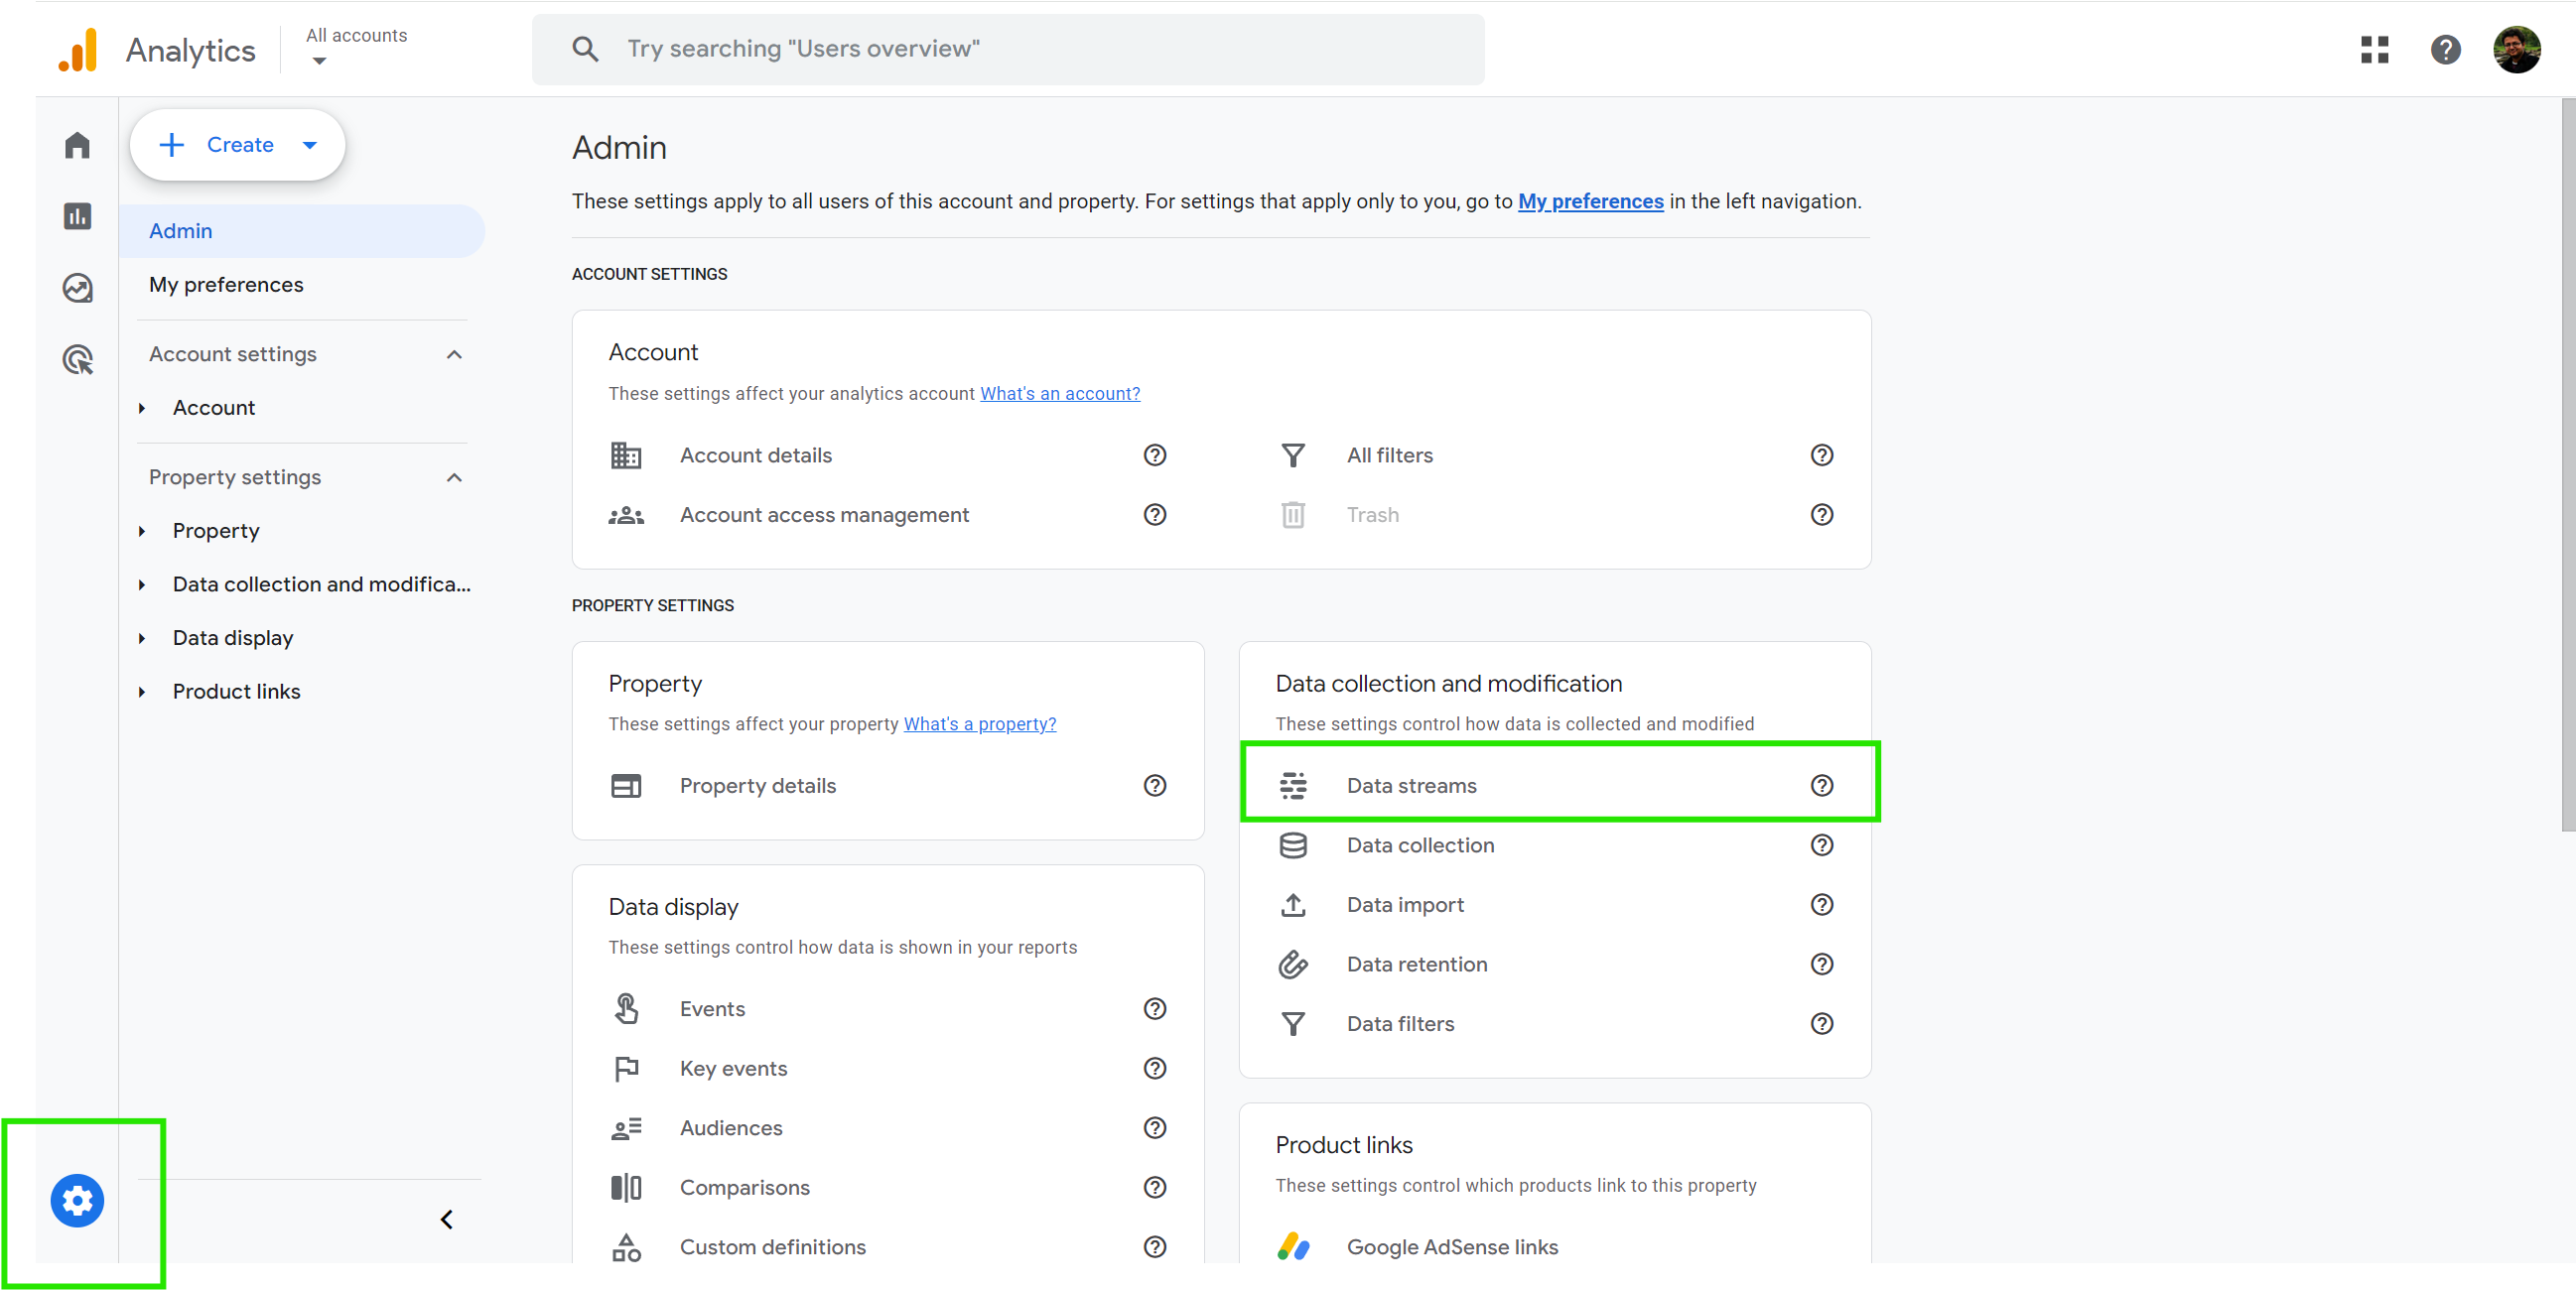
Open the datastream view
Move to the admin section
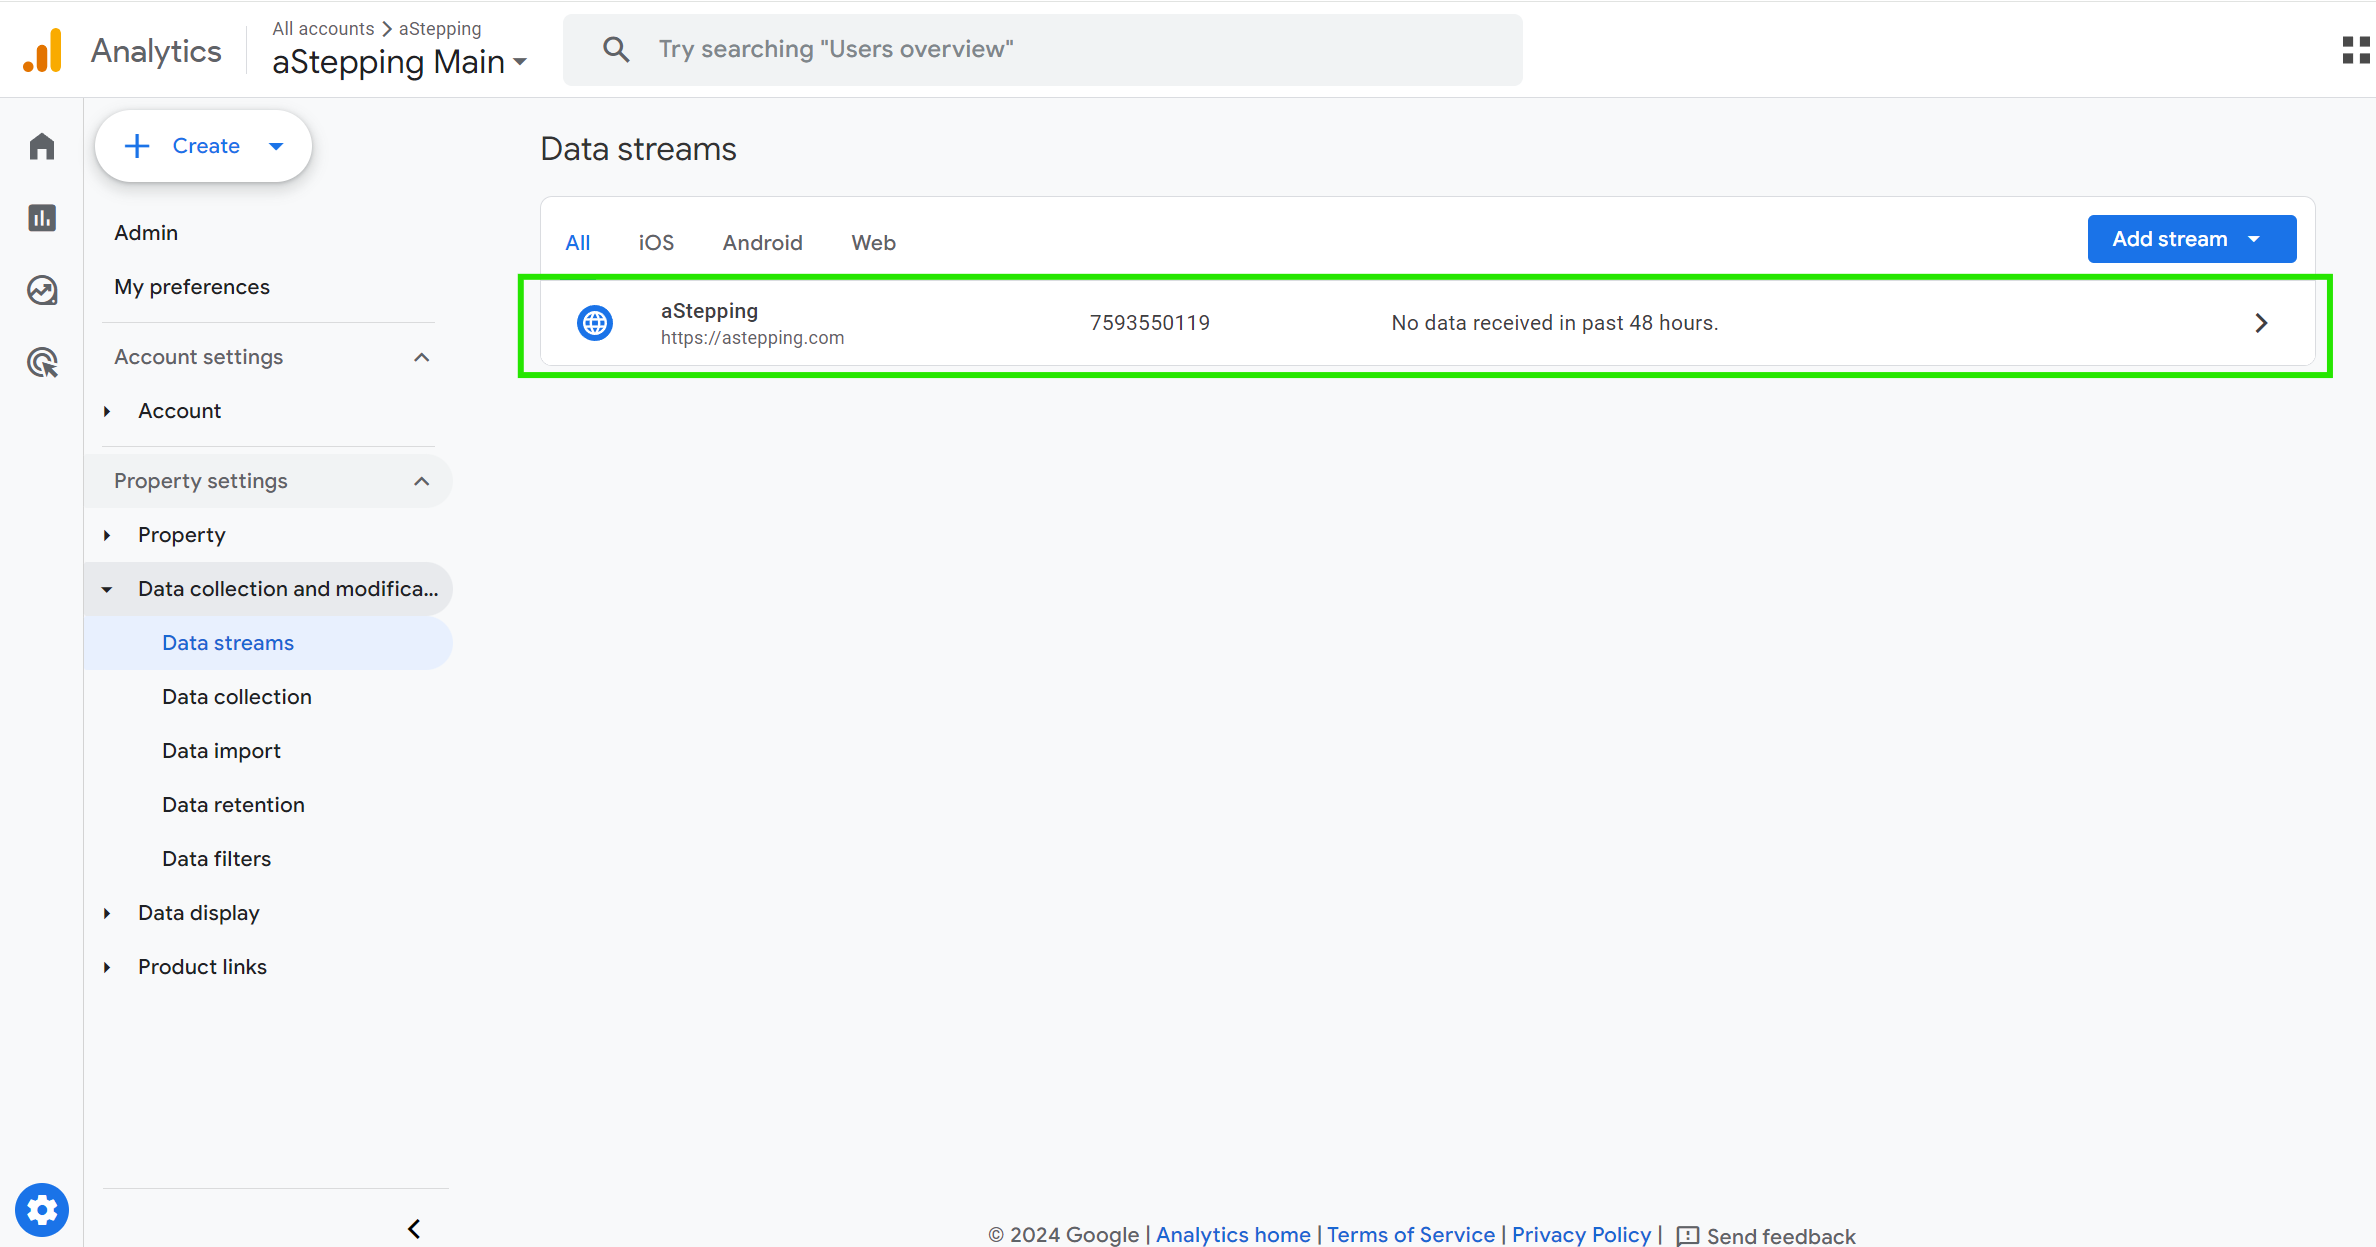
Open the relevant datastream
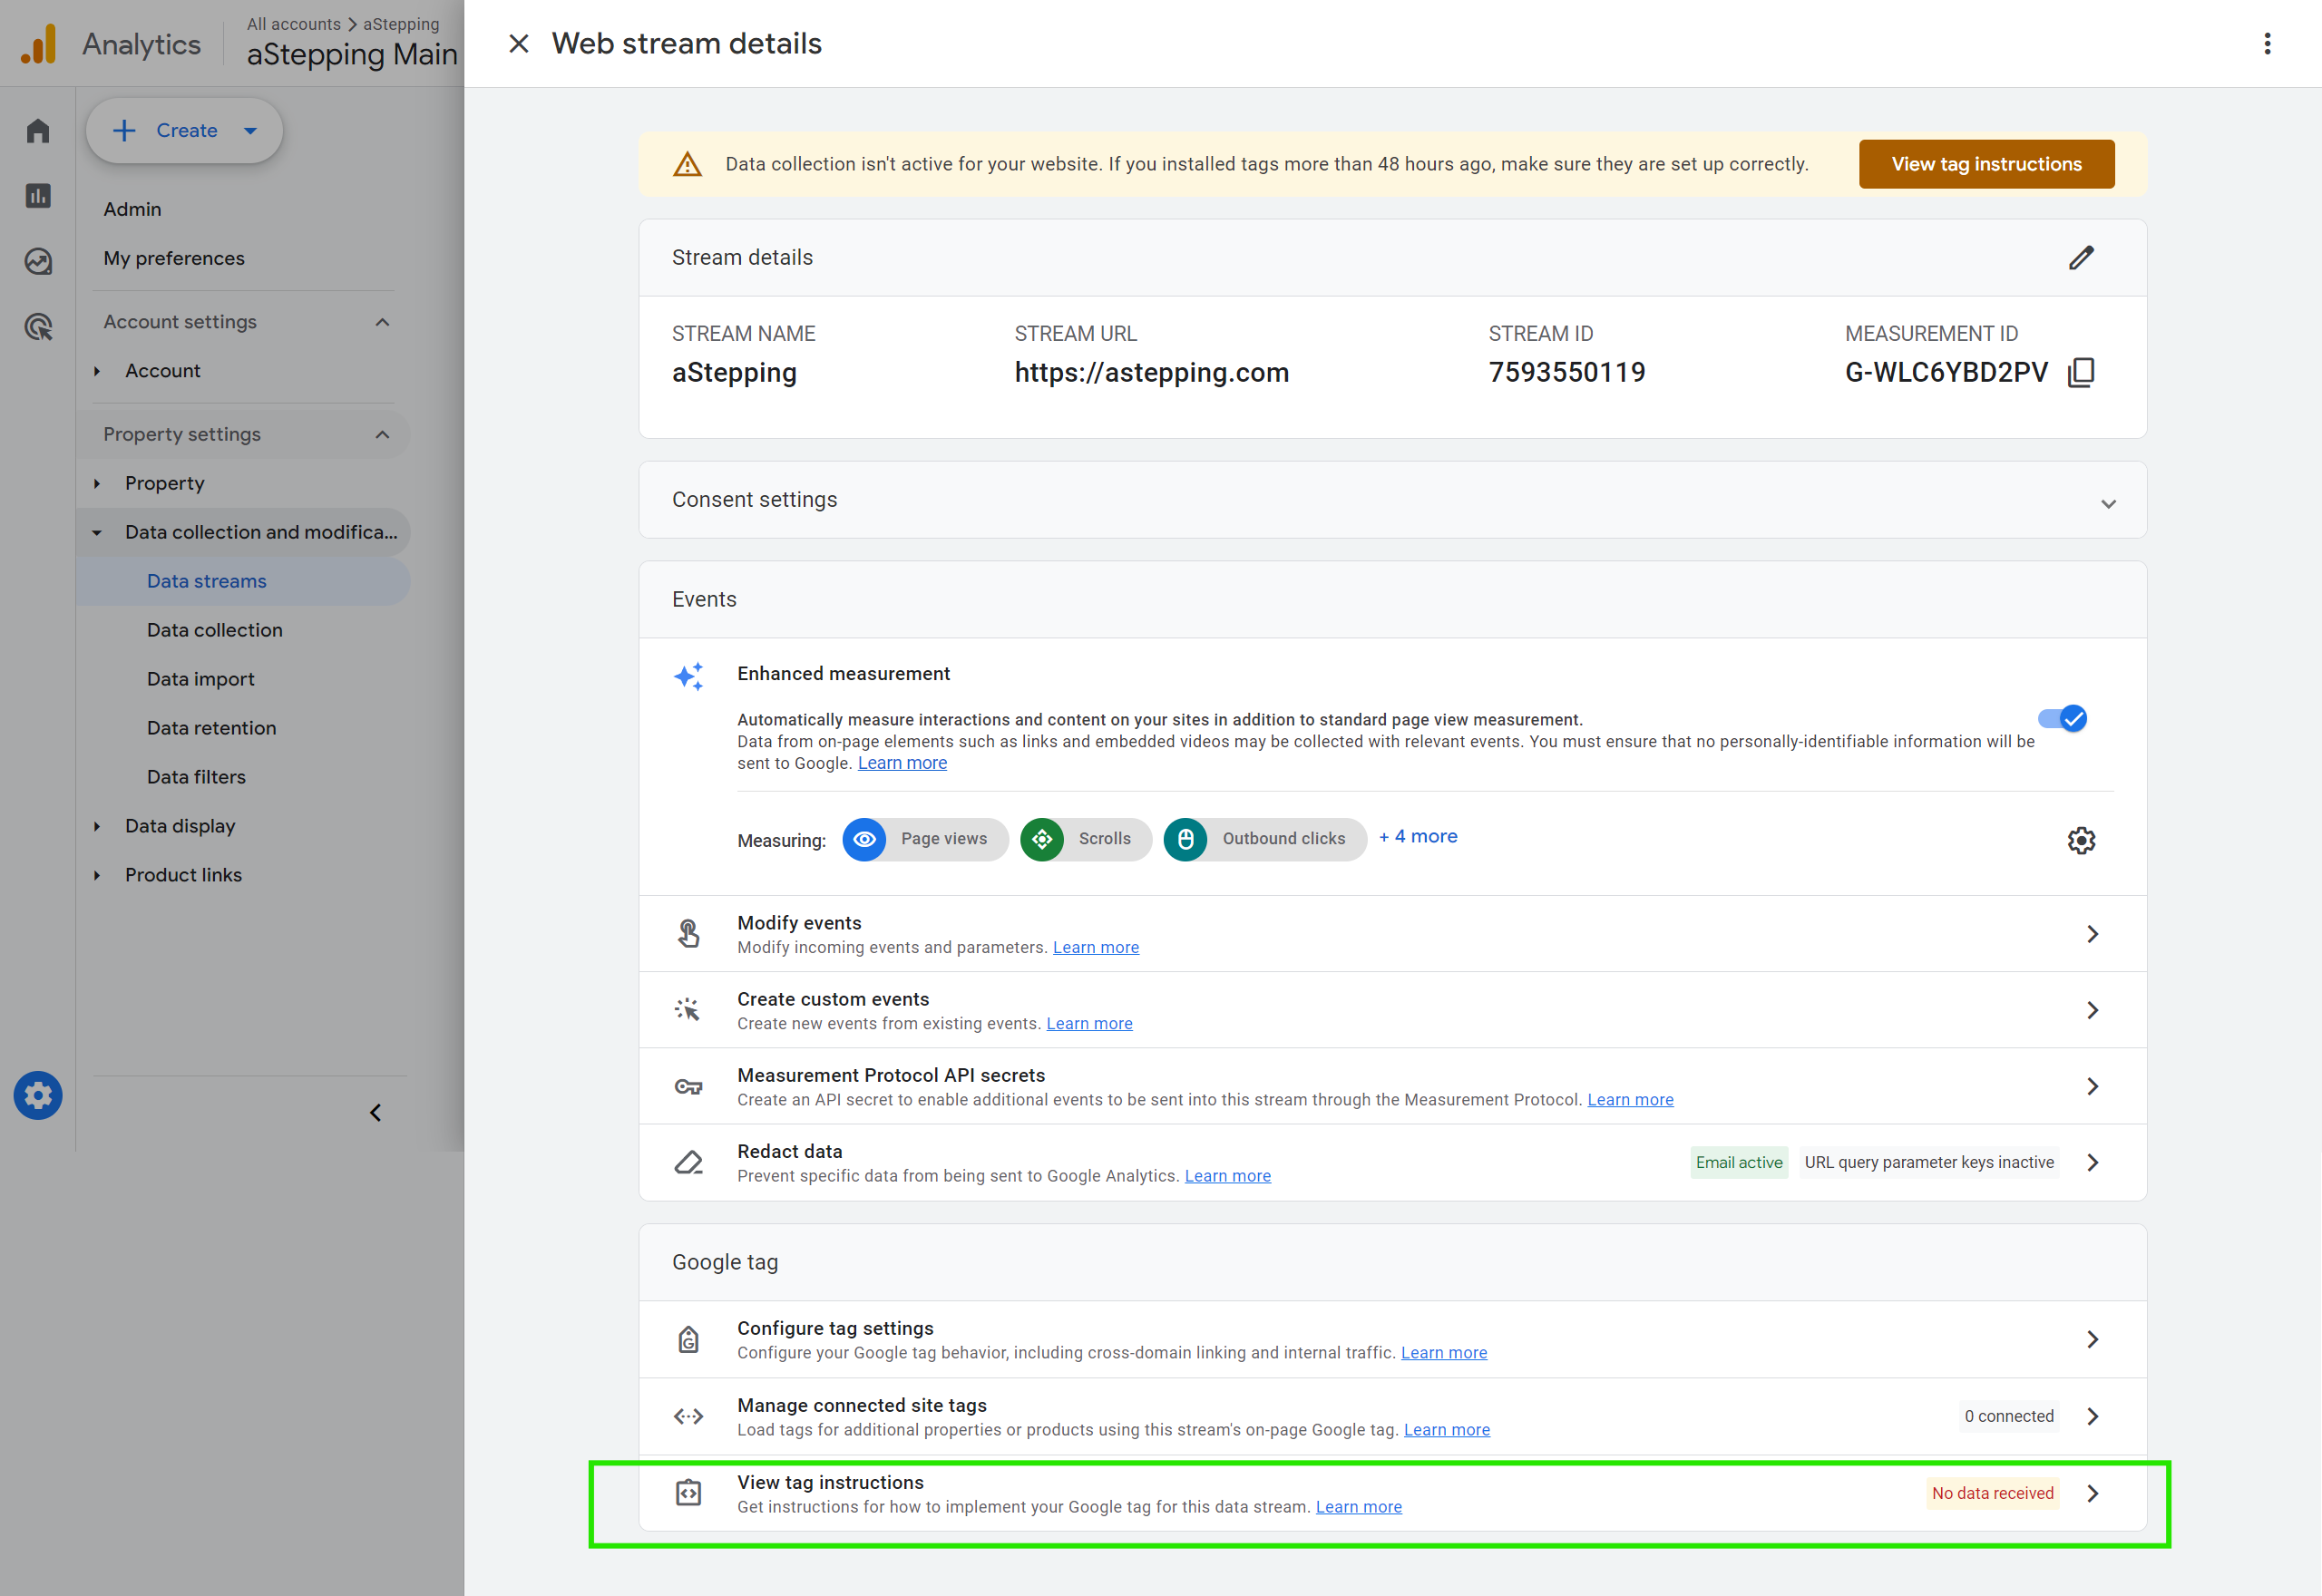
Open the tag instructions
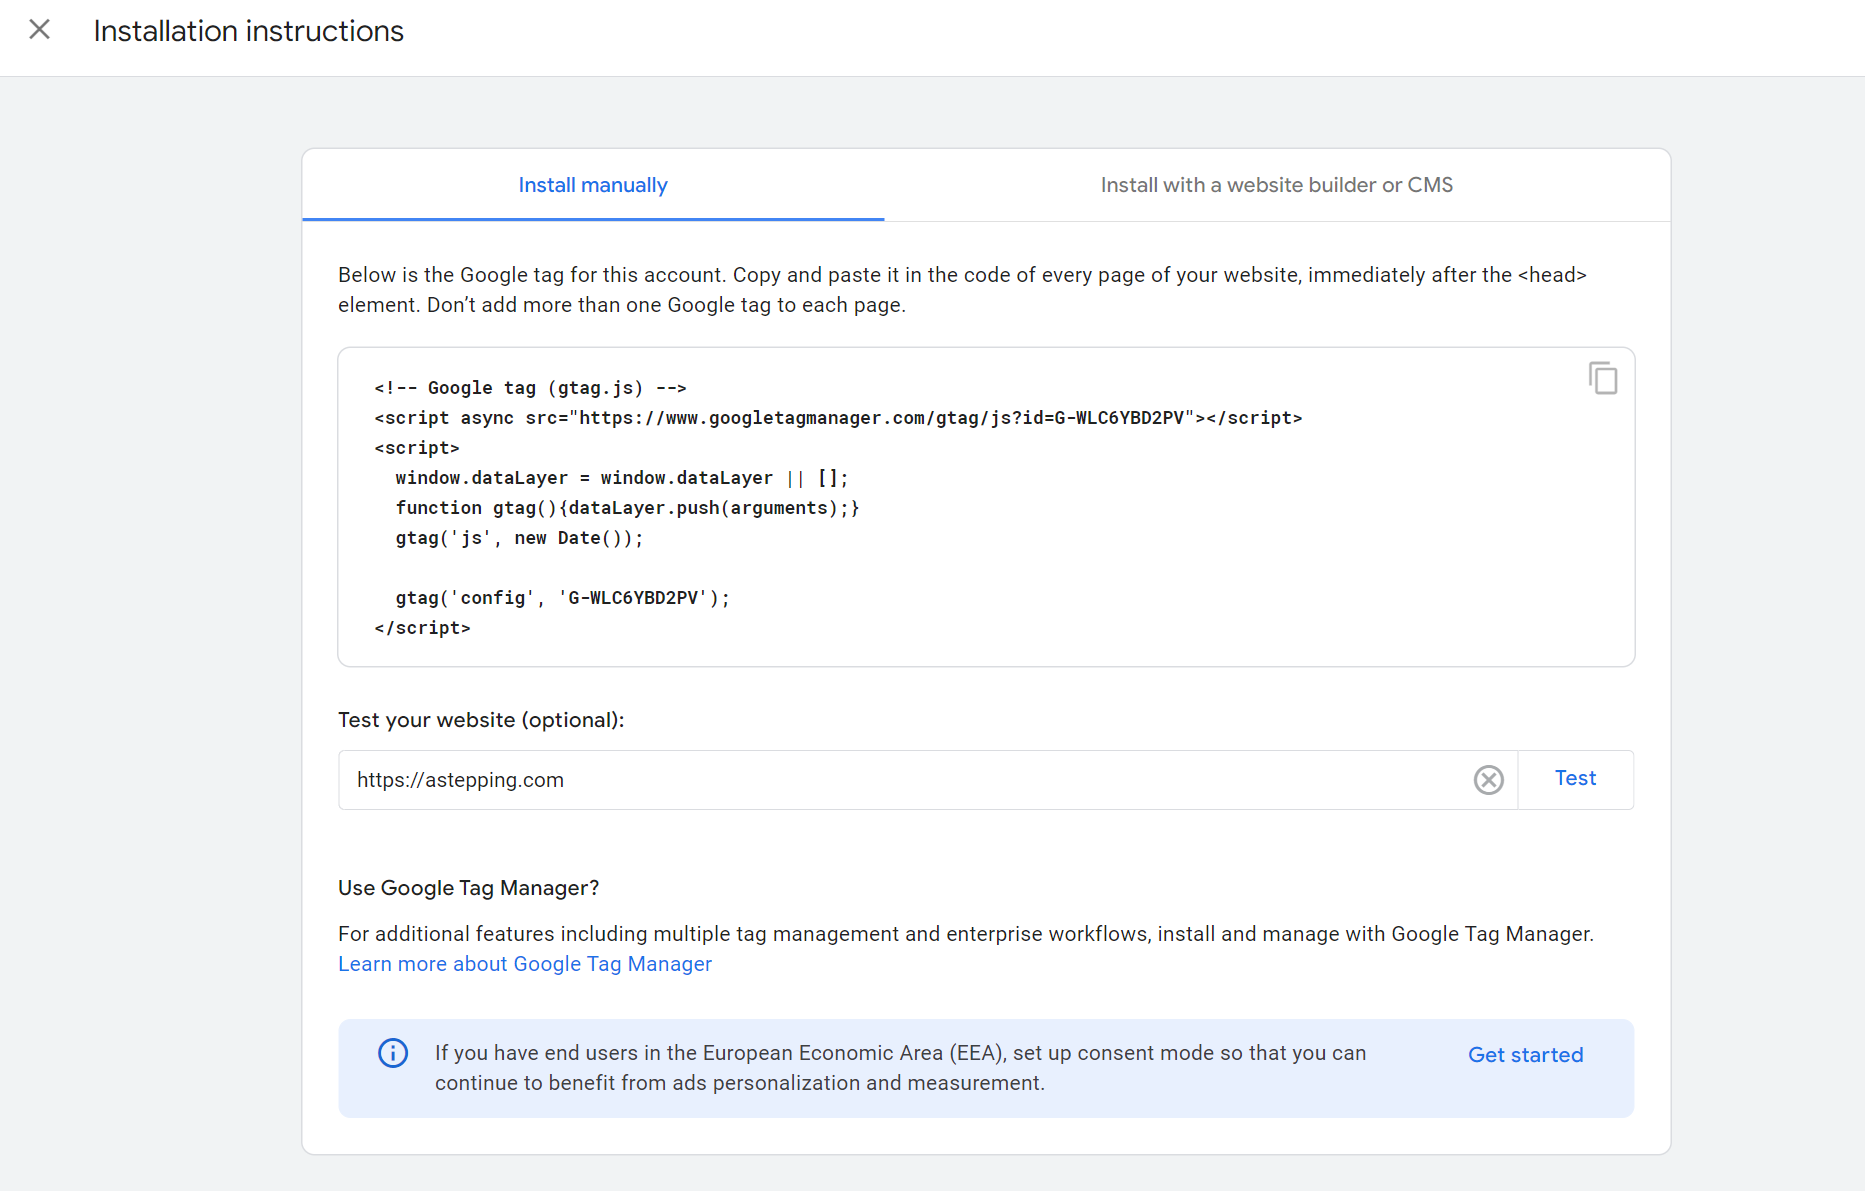
This is the GA4 tracking code with the measurement ID
Copy the code snippet by clicking on the copy icon
Copy that code, head back to your WordPress dashboard, and paste it into the “Code Snippets” section. Make sure to select “Site Wide Header” as the location, and you’re all set. Next, toggle the active switch to ON. and save the snippet, by clicking on the “Save Snippet” button.
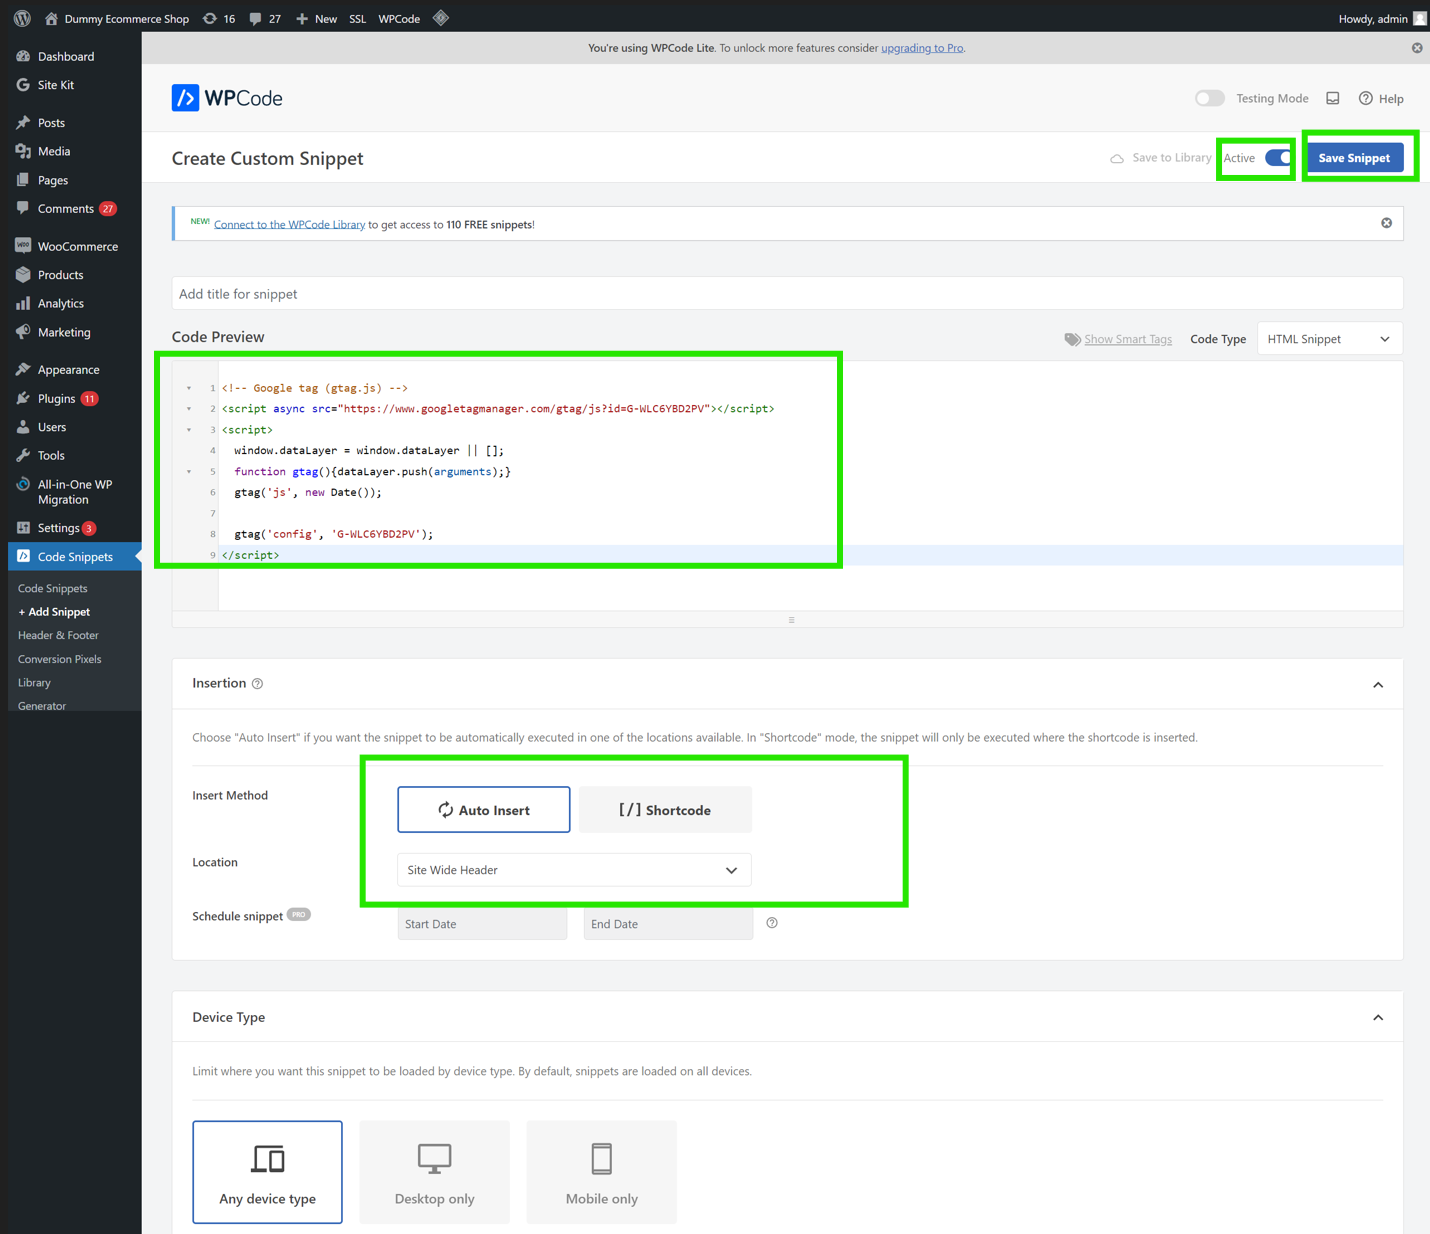
Paste the GA4 tracking code in this box
Select site wide header, keep auto-inserted selected
Switch the toggle button to active, and then save the snippet.
Verify Connection
After making changes to the plugin and subsequently to the website code, it’s important to clear your website’s cache to ensure the new tracking code is properly loaded on all pages.
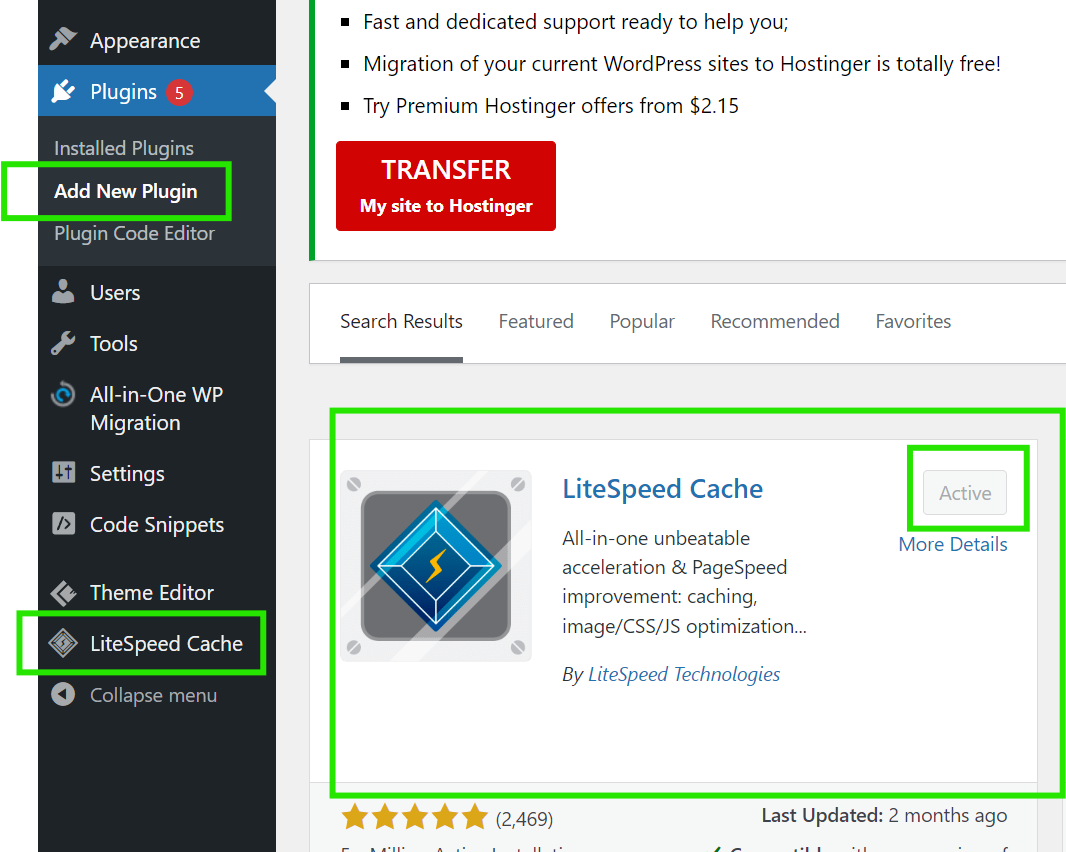
Click on add new plugin
Install and activate LiteSpeed Cache, by searching for the keyword LiteSpeed Cache
On reloading the admin section of WordPress, you will be able to see LiteSpeed Cache installed for use.
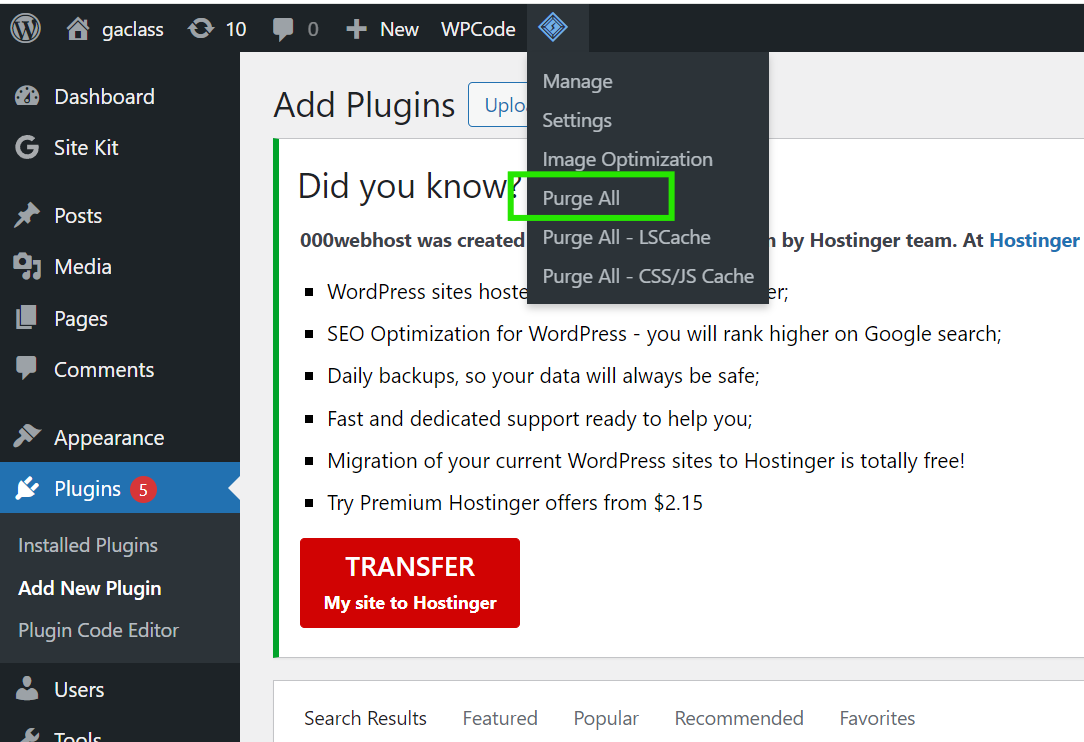
Hover on the diamond shaped icon on the top bar, and click on purge all. This will clean your cache.
Hover on the diamond shaped icon on the top bar, and click on purge all. This will clean your cache. Open your website in an incognito window and check the real-time report in your GA4 account. You should see the page views showing up. To navigate to the real-time reports, click on the Report option in the left-hand side tab of the GA4 interface, and then select Realtime to view the real-time report.
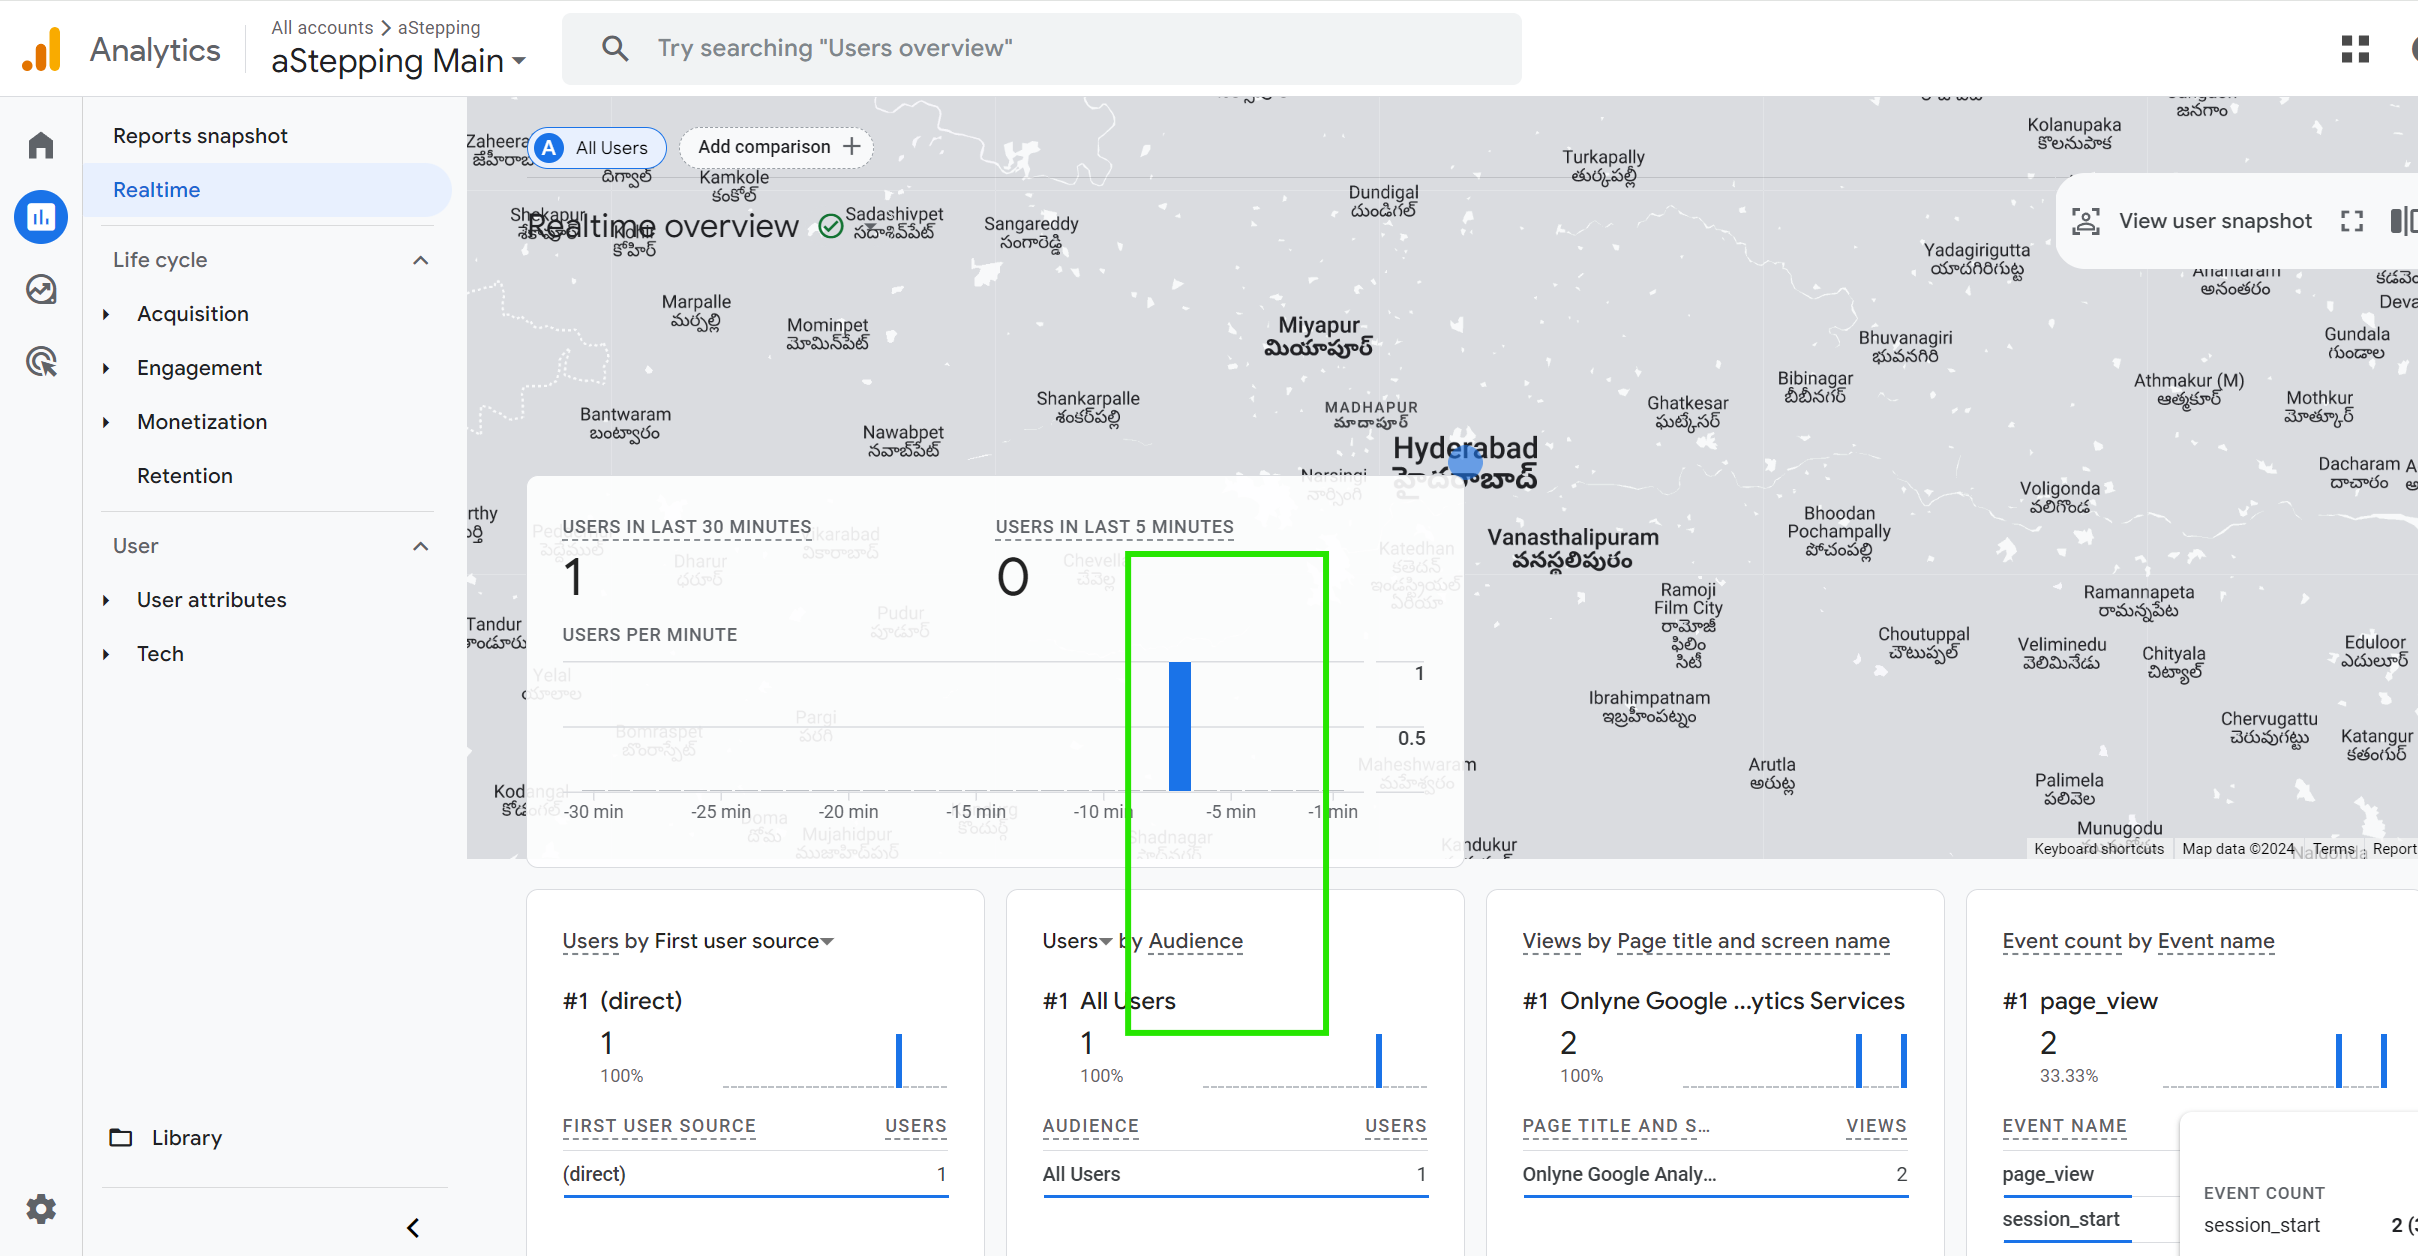
A new user will show up in the real time reports.
Understanding What Happens When the Tracking Code is Inserted
Now, let’s take a closer look at what happens when the tracking code is inserted into your website. This is where things get really interesting!
The Magic Behind the Tracking Code
When you insert the tracking code, it’s essentially a JavaScript snippet that gets added to the header section of every page on your website. Here’s a breakdown of what happens:
- Code Insertion: The tracking code is inserted in the head section of your website’s HTML. This ensures that the code is loaded every time a page is accessed.
<script async src=”https://www.googletagmanager.com/gtag/js?id=YOUR_MEASUREMENT_ID”></script>
<script>
window.dataLayer = window.dataLayer || [];
function gtag(){dataLayer.push(arguments);}
gtag(‘js’, new Date());
gtag(‘config’, ‘YOUR_MEASUREMENT_ID’);
</script> - Data Collection: Every time a user visits your website, this JavaScript code is executed. It sends a request to Google Analytics servers, passing along various pieces of information about the visit. This includes data like the page URL, the user’s browser, their location, and much more.
- Real-time Tracking: As soon as the tracking code sends data, you can see it reflected in your Google Analytics account in real-time. This allows you to monitor your website traffic and user interactions almost instantaneously.
Detailed Inspection
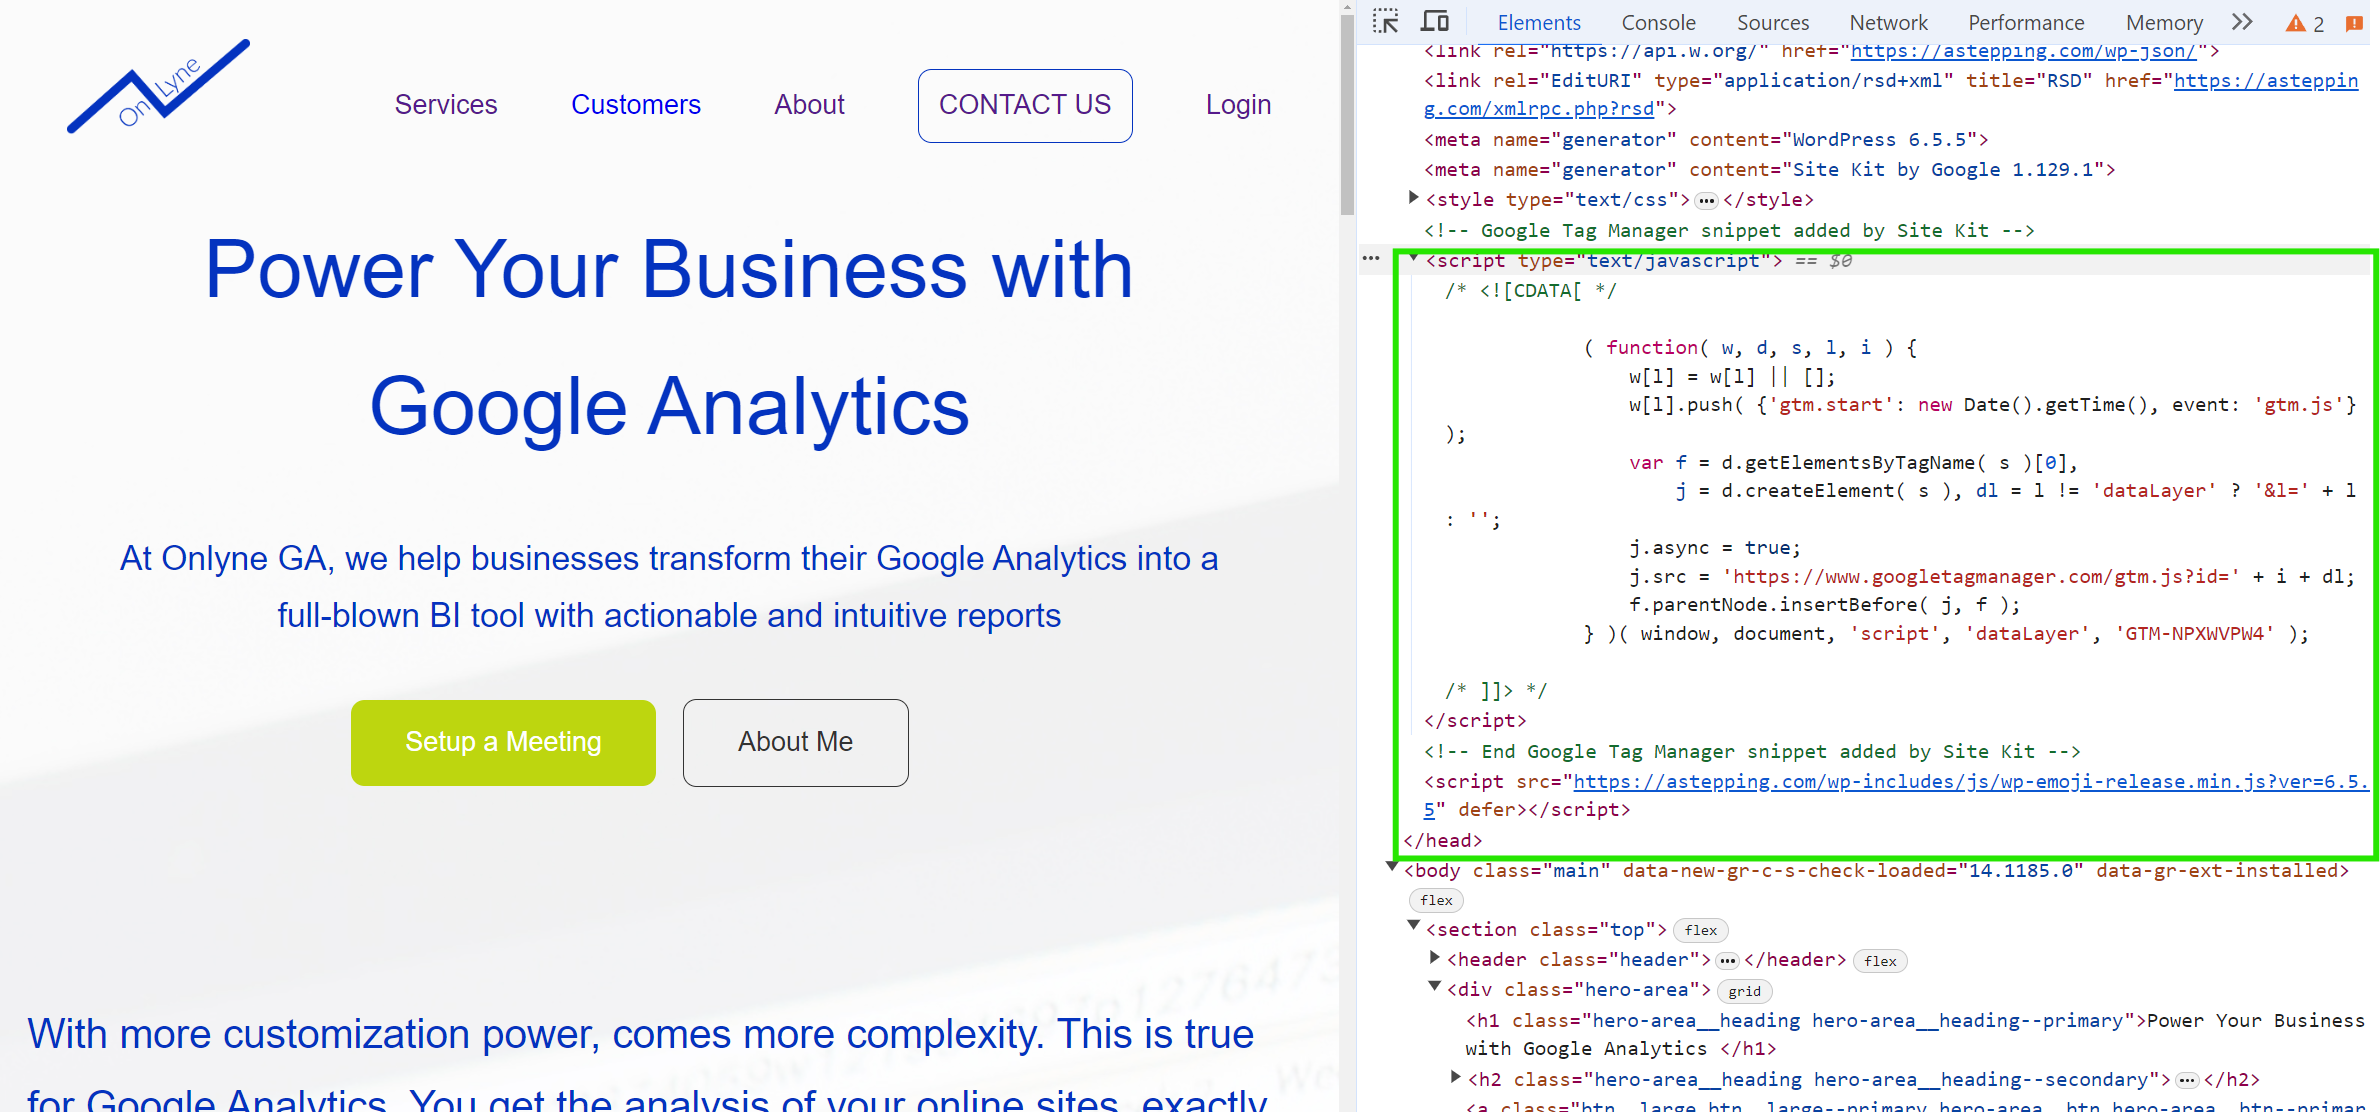
To see the tracking code in action, you can inspect the HTML of your website:
- Right-click on your webpage and select Inspect.
- In the Elements tab, search for the tracking code within the head section.
A new user will show up in the real time reports.
- You’ll see the exact JavaScript snippet you inserted earlier. This confirms that the code is present and active on every page of your site.
- Additionally, if you navigate to other pages on your website and inspect the HTML, you’ll find the same tracking code there as well. This is because the plugin has inserted the code into the head section of all your site’s pages.
What happens behind the scenes
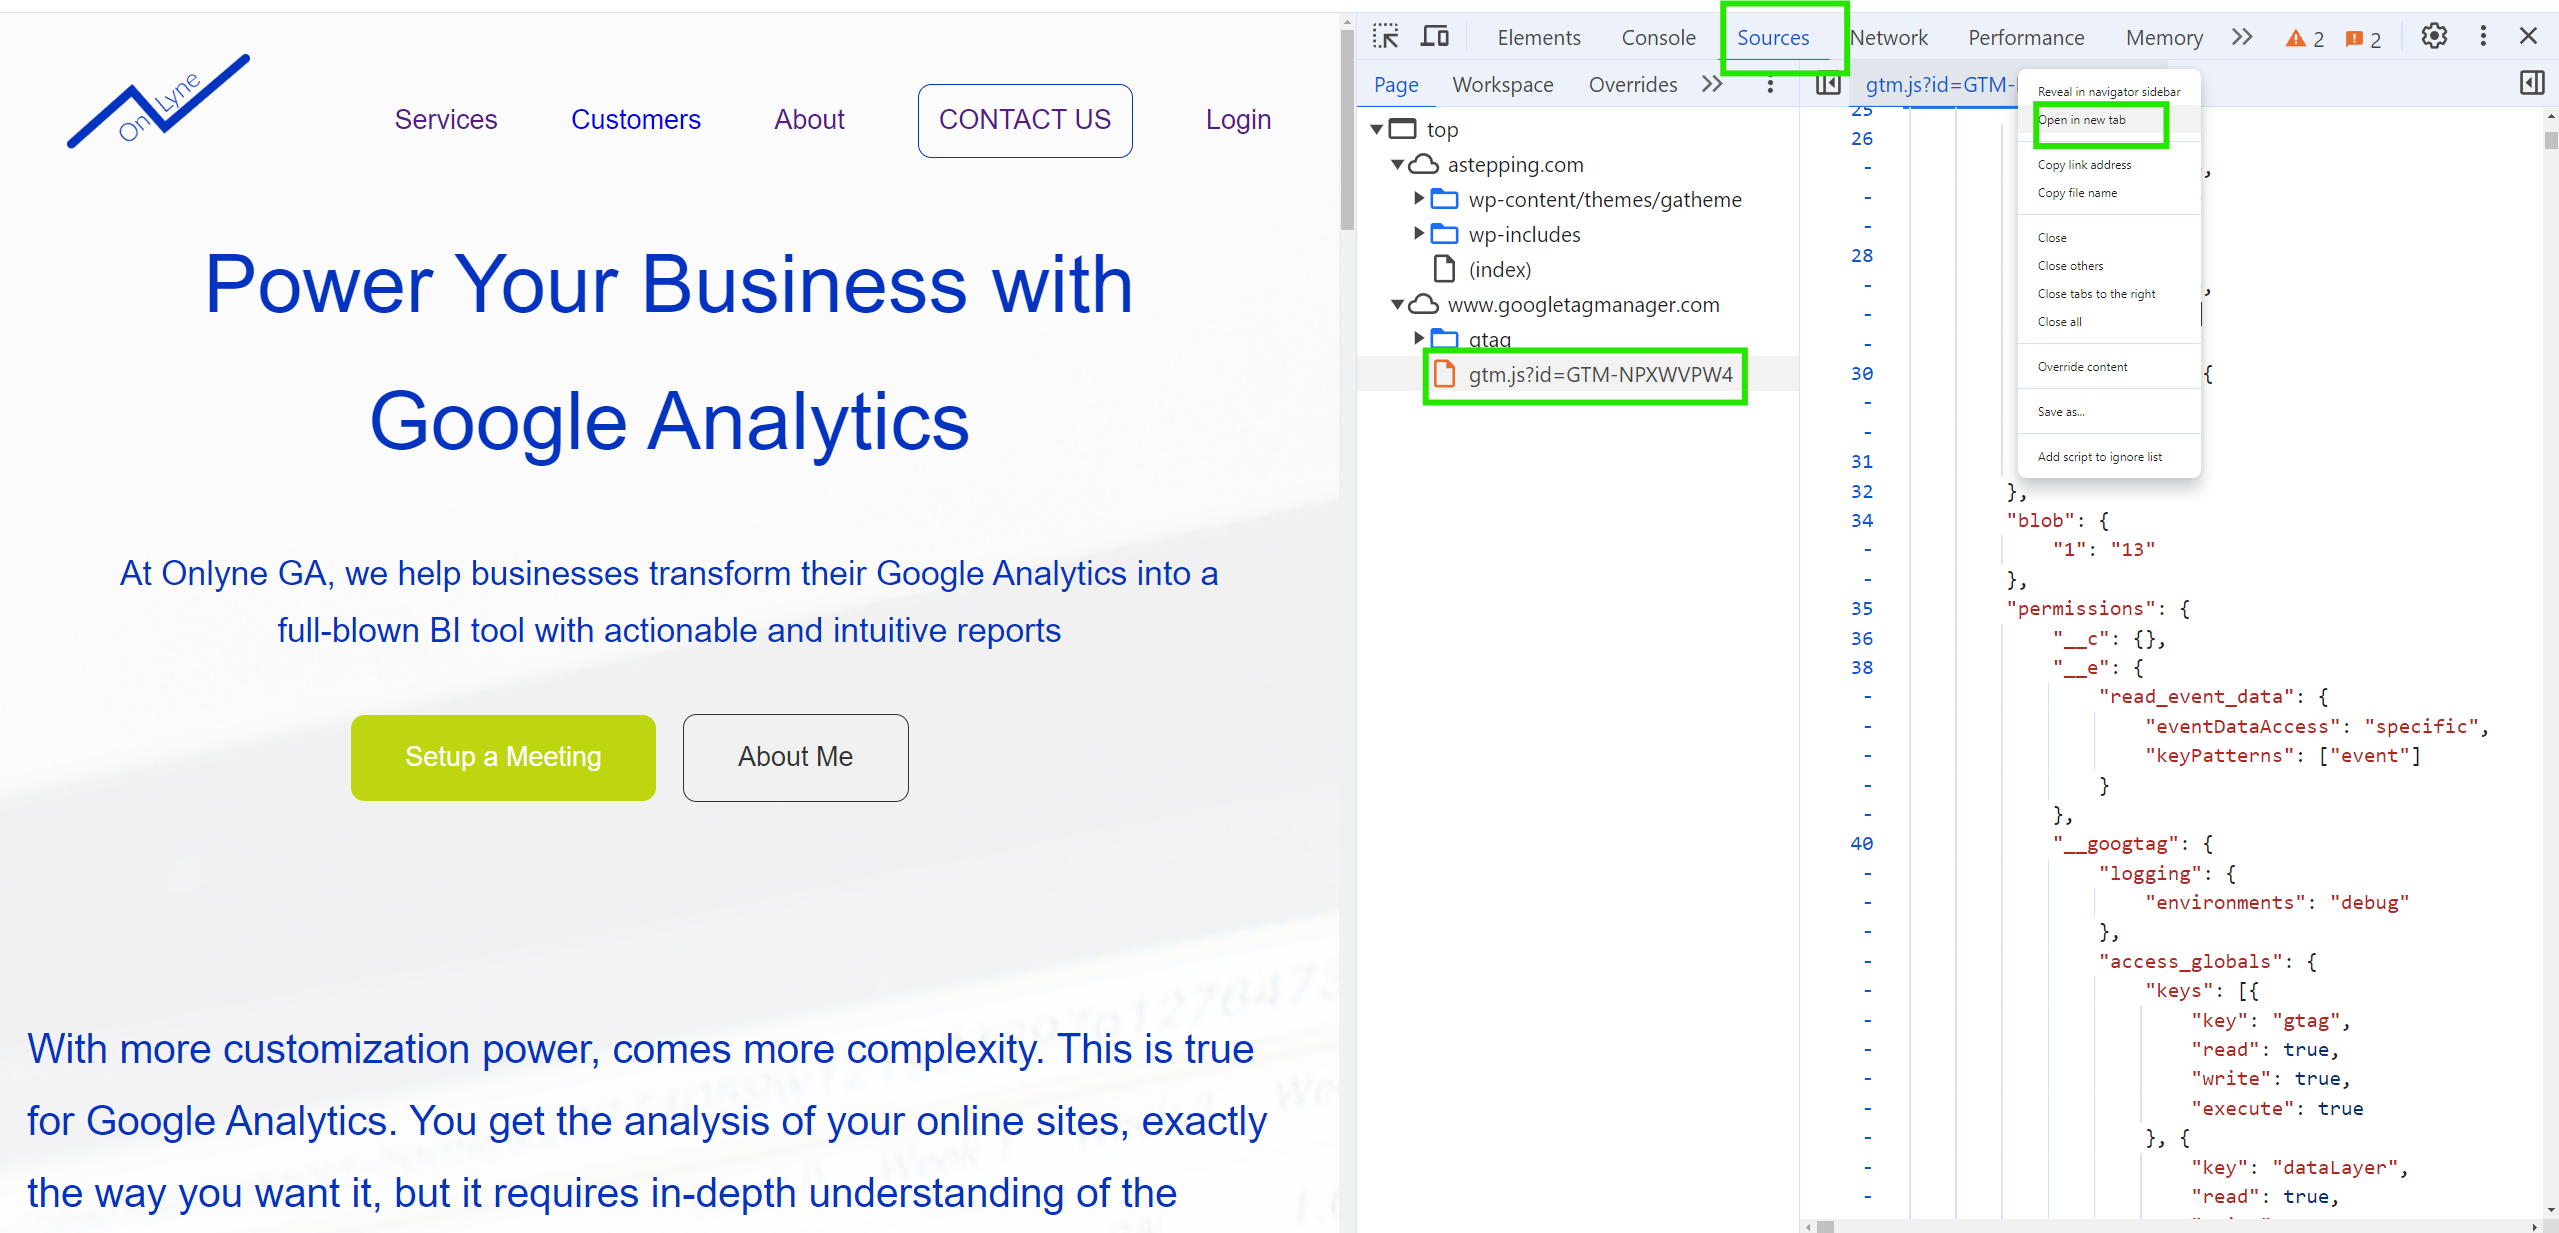
The tracking code used in the file links to a JavaScript file that has everything the website needs to send data to google analytics. This JavaScript file provides the true power and the behind-the-scenes capability for the entire data collection to work between Google Analytics 4 and the website.
A new user will show up in the real time reports.
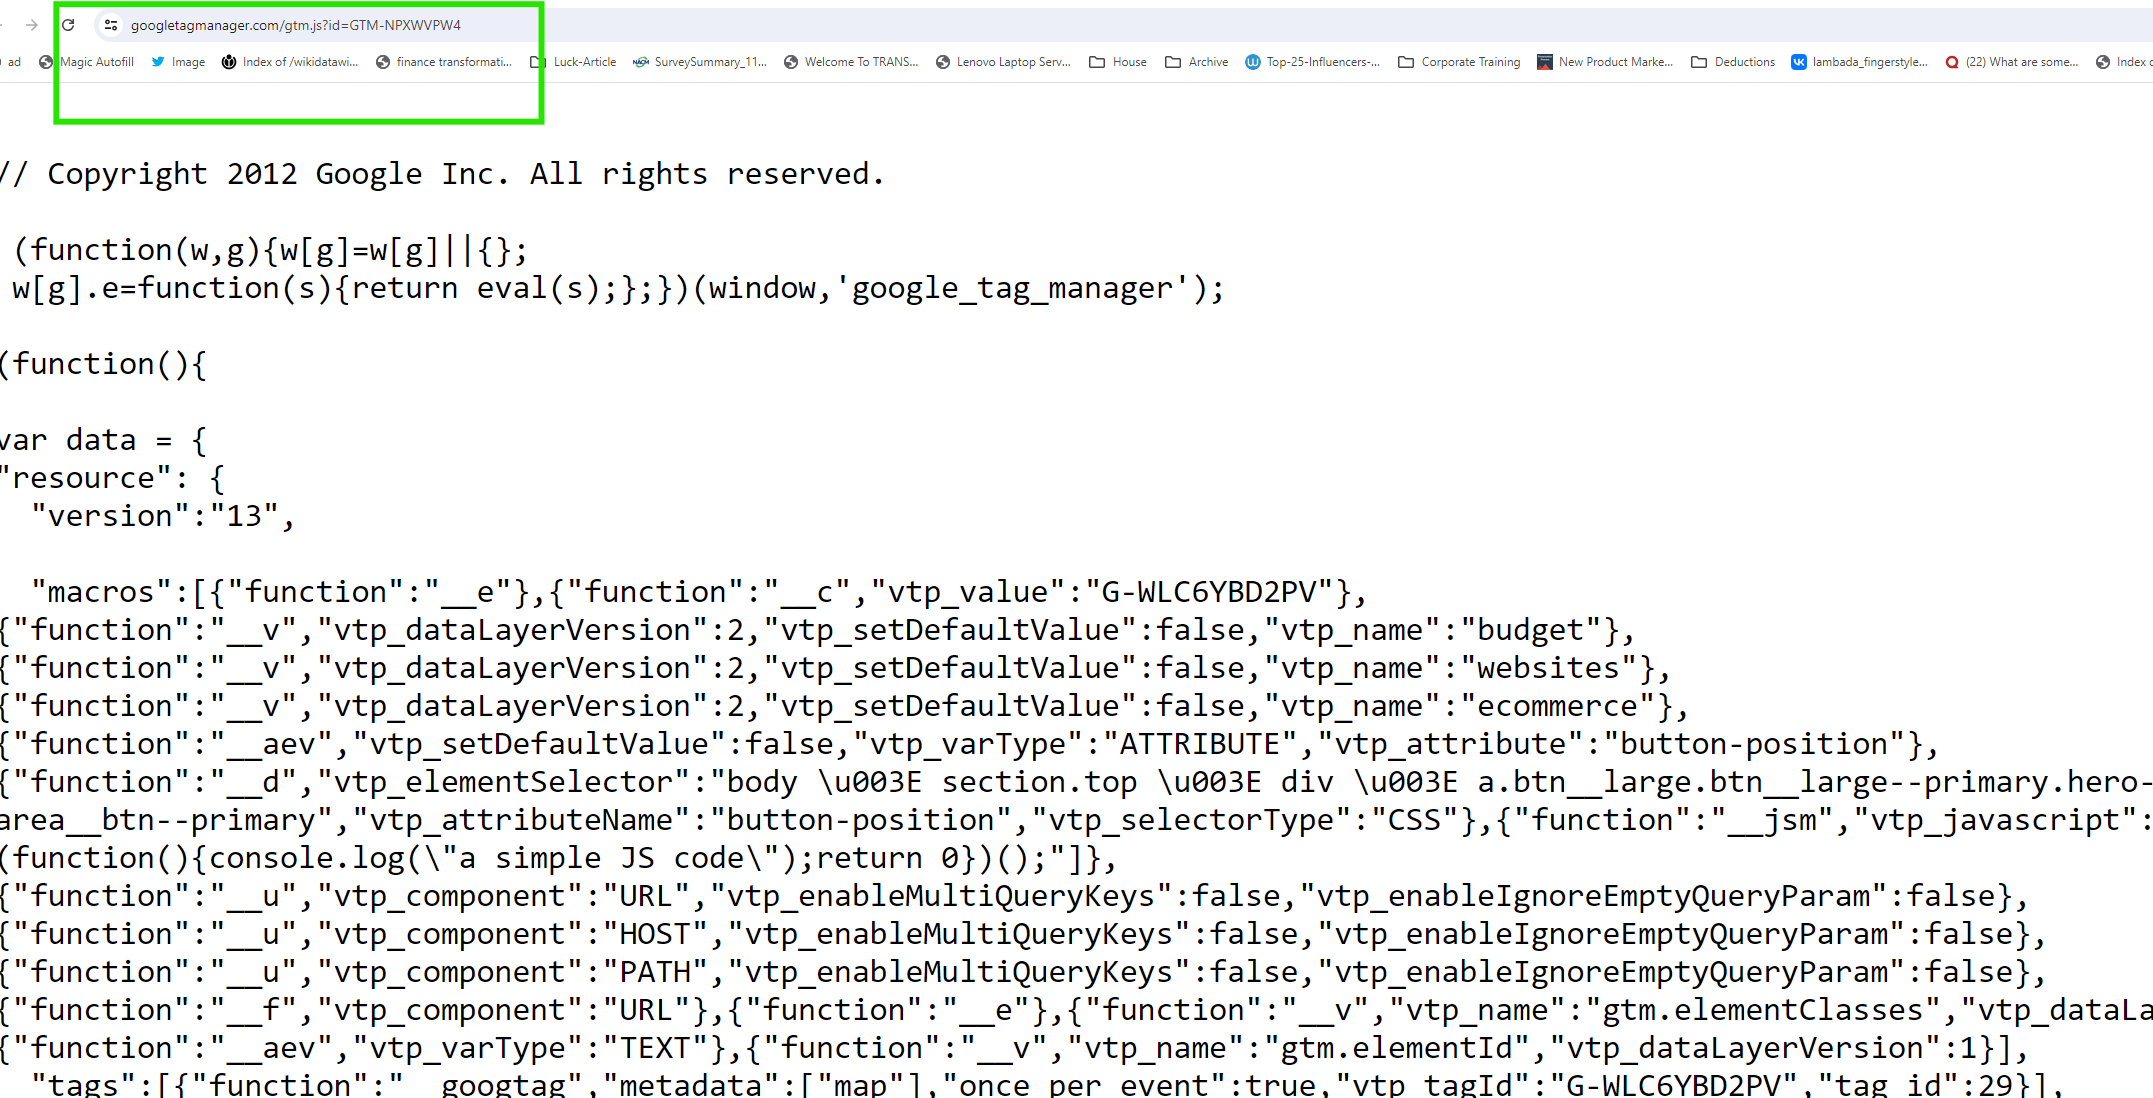
A new user will show up in the real time reports.
Manually Adding the Code
If you prefer not to use a plugin, you can manually add the code to your theme’s header file. This steps direct involvement with the website php and html code and therefore, it is not a recommended method.
Edit File – header.php
Navigate to Theme Editor: Website Admin Area > Go to Appearance > Theme File Editor.

A new user will show up in the real time reports.
Find header.php: Locate and open the header.php file.
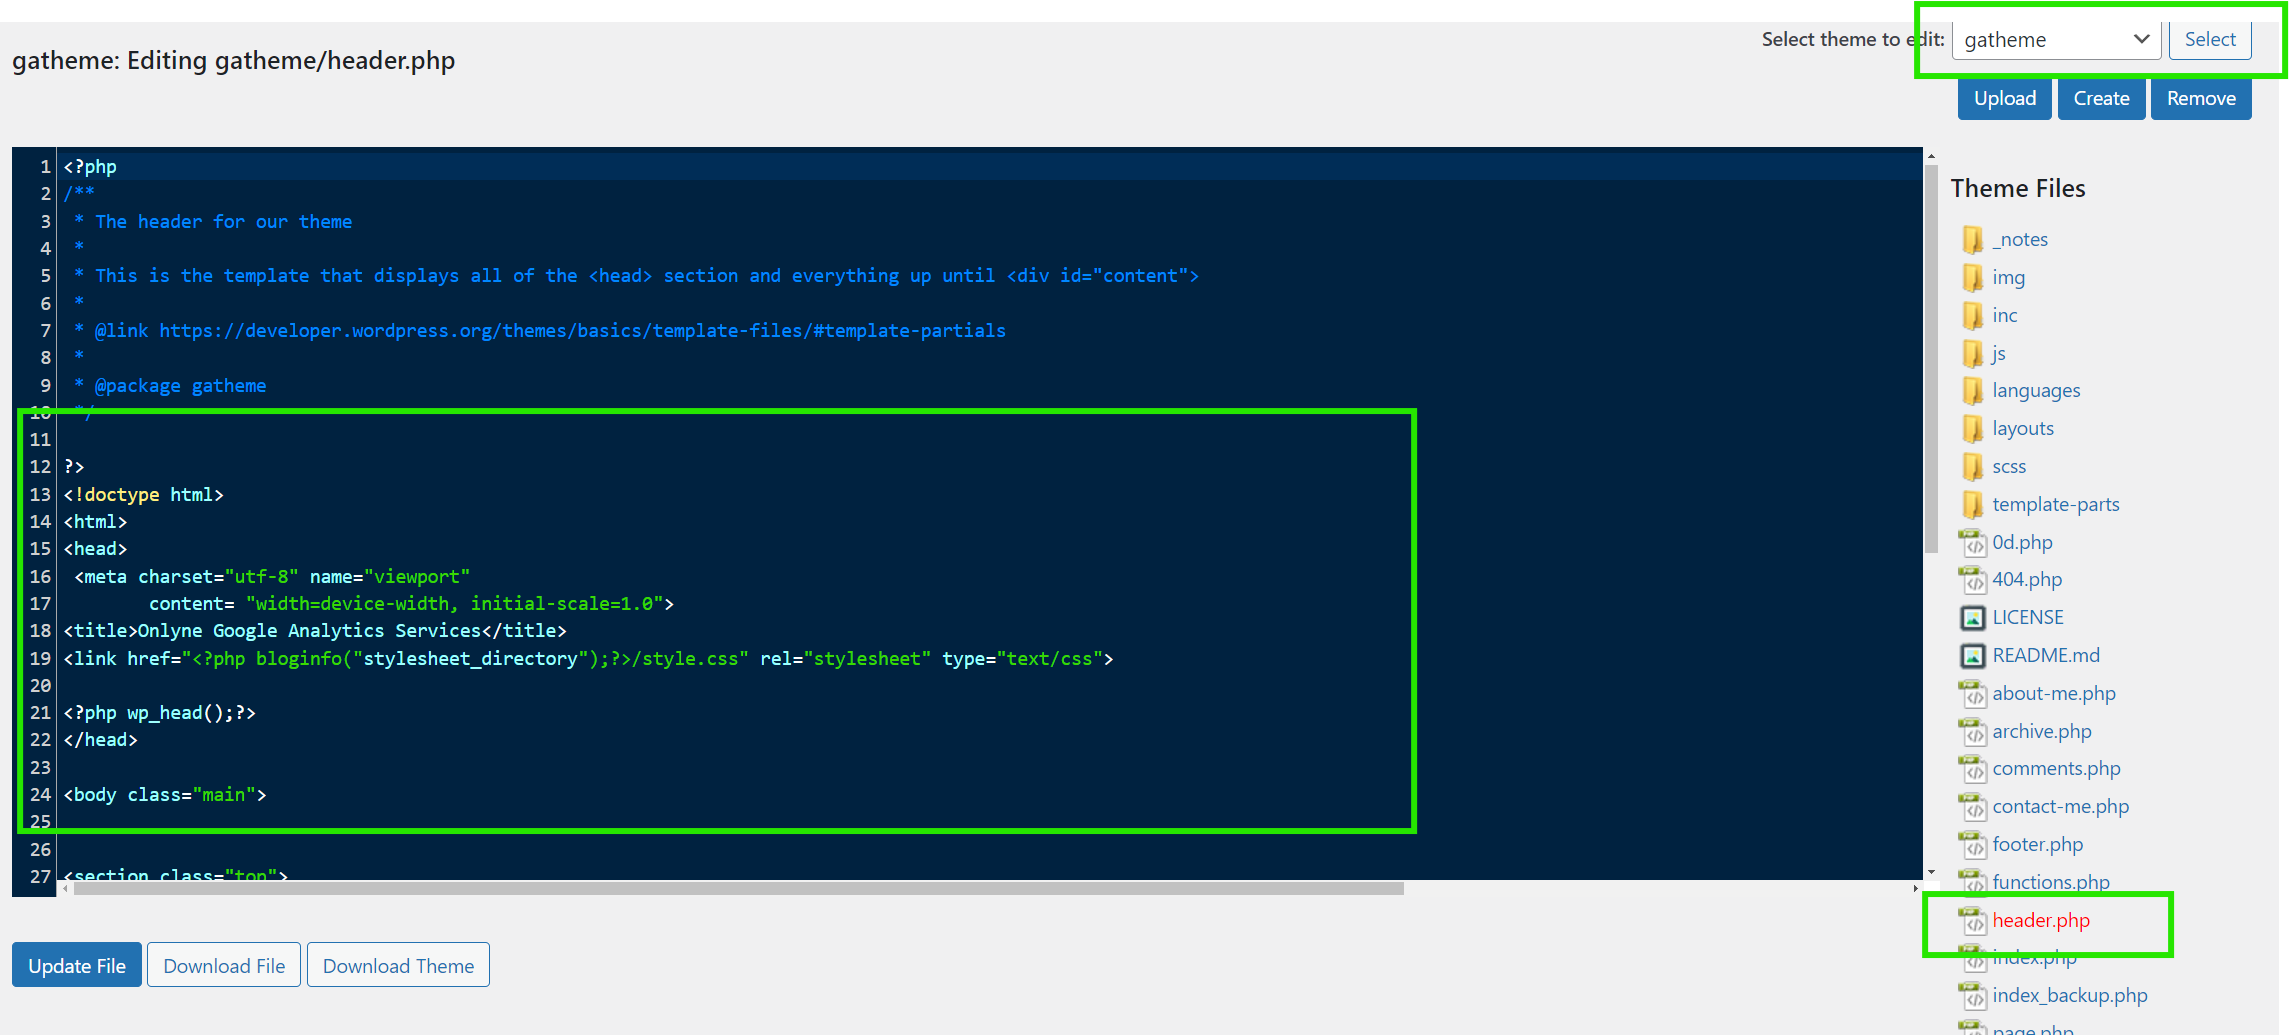
A new user will show up in the real time reports.
Insert the Code: Paste the GA4 tracking code within the <head> section of the file.
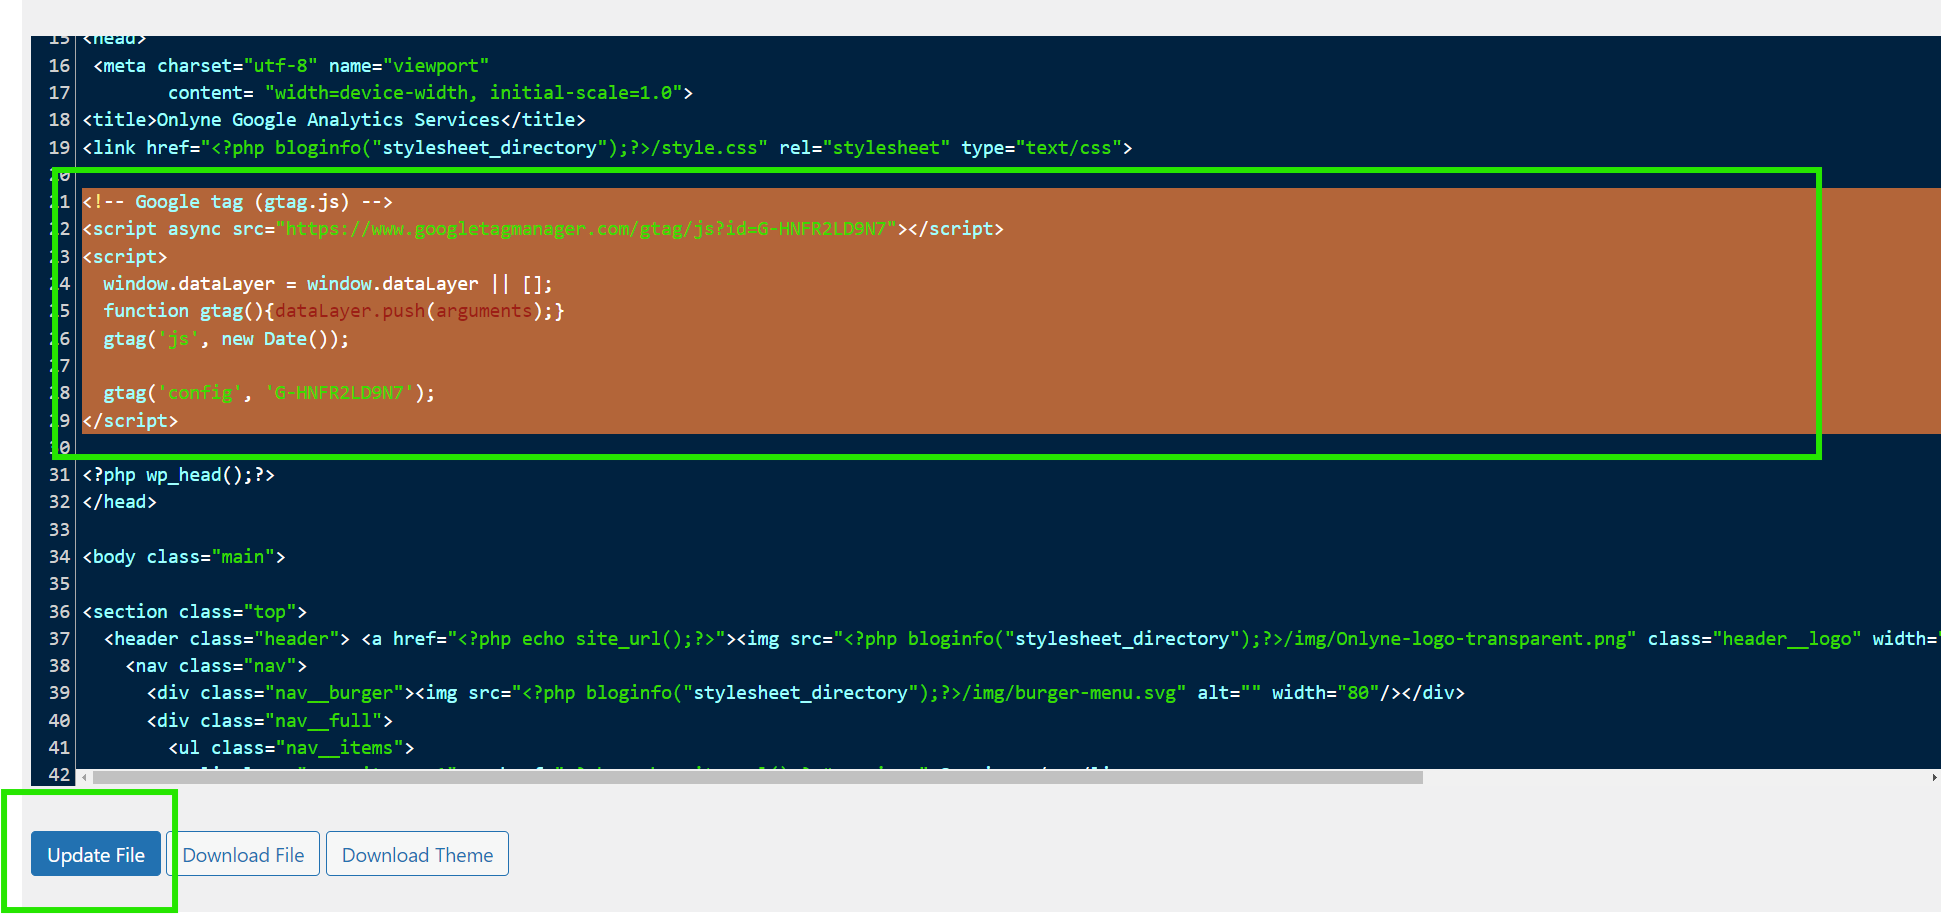
A new user will show up in the real time reports.
Using Google's Site Kit Plugin
Site Kit is a powerful tool from Google that integrates various Google services with your WordPress site.
